If you’ve ever found yourself stuck in your driveway or garage because your Chamberlain garage door opener or remote suddenly stopped working, you’re not alone. It’s a frustrating experience that many homeowners face. Fortunately, most issues can be solved without professional help. In this guide, we’ll walk you through how to troubleshoot Chamberlain garage door opener and remote that won’t work, using a comprehensive and easy-to-follow approach.
Understanding your Chamberlain garage door opener’s components and how they function is the first step in resolving issues. We’ll cover both simple and complex causes, from dead batteries to sensor misalignments and signal interference. By the end of this guide, you’ll know exactly how to diagnose and fix the most common problems.
Read too: How Many Remotes Can A Chamberlain Garage Door Opener Have? Understaanding the Limits and Options
Common Reasons Why Your Chamberlain Garage Door Opener and Remote Won’t Work
Before diving into troubleshooting, it’s important to understand the potential reasons your Chamberlain garage door system may malfunction. Here are some of the most common causes:
- Dead remote batteries
- Sensor misalignment or blockage
- Interference with wireless signals
- Faulty wall switch or remote
- Power issues with the opener unit
- Garage door track obstructions
- Reprogramming or syncing issues
Now let’s go step-by-step to fix these problems and troubleshoot Chamberlain garage door opener and remote that won’t work.
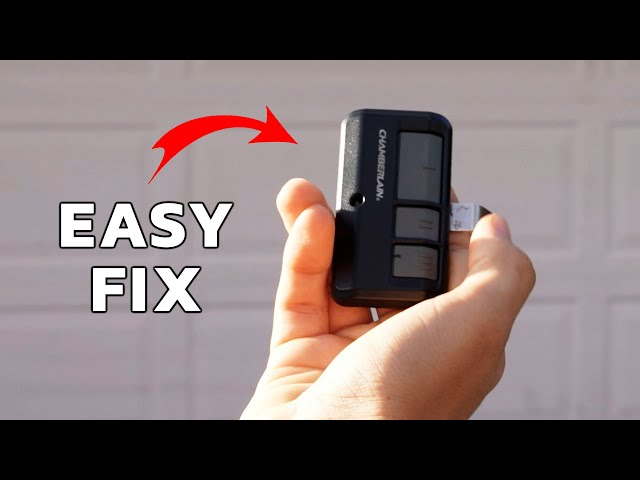
Step 1: Check and Replace Remote Batteries
The simplest and most common issue is dead or weak remote batteries. Chamberlain remotes typically use CR2032 or similar coin batteries.
How to Check:
- Open the back of the remote.
- Inspect the battery for corrosion or leakage.
- Replace the battery with a new one of the same type.
- Test the remote to see if it works.
If the remote still doesn’t respond, move on to the next step.
Step 2: Inspect the Garage Door Opener for Power
Your garage door opener needs consistent power to operate. Check if the LED lights on the opener are illuminated.
Tips:
- Make sure the opener is plugged in.
- Test the outlet by plugging in another device.
- If using a GFCI outlet, press the “reset” button.
No power means the motor can’t receive commands from the remote or wall control, so restoring it is crucial.
Step 3: Test the Wall-Mounted Control Panel
If the wall switch doesn’t work, but the opener has power, the issue might lie within the switch or wiring.
Troubleshooting Steps:
- Try using the wall control.
- If unresponsive, check the wiring to ensure it’s not loose or frayed.
- If available, test with another Chamberlain-compatible control panel.
This step helps determine if the problem is remote-related or affects the system overall.
Step 4: Reprogram Your Chamberlain Remote
Sometimes, your remote may lose its programming, especially after a power outage or firmware update.
To Reprogram:
- Locate the “Learn” button on the back or side of your opener.
- Press and hold it until the LED light blinks.
- Within 30 seconds, press the button on your remote.
- Wait for the LED to blink again to confirm pairing.
This resynchronizes the remote to the garage door opener.
Step 5: Align and Clean the Safety Sensors
Chamberlain openers come with safety sensors at the bottom of the garage door tracks. These sensors prevent the door from closing if there’s an obstruction.
Issues to Check:
- Ensure sensors face each other and are aligned.
- Clean any dust or debris from the sensor lenses.
- Check for wiring issues or physical damage.
If the sensors are blinking, this indicates misalignment or blockage.
Step 6: Inspect the Antenna and Signal Interference
Chamberlain remotes communicate via radio signals. If you’re experiencing range issues or complete failure, signal interference might be the culprit.
Solutions:
- Unplug nearby wireless devices such as routers or LED lighting, which might interfere.
- Ensure the garage door opener’s antenna is hanging straight down.
- Avoid using remote near metal objects or inside the car if the signal is weak.
Step 7: Lubricate Tracks and Check for Obstructions
Sometimes the problem is mechanical. If your remote works but the door doesn’t move or struggles, there may be a blockage or lack of lubrication.
What to Do:
- Check tracks and rollers for dirt or physical obstructions.
- Lubricate all moving parts with garage door lubricant.
- Avoid using WD-40 as it can attract dirt.
Mechanical resistance can prevent the door from opening even if the opener is functioning properly.
Step 8: Reset Your Chamberlain Garage Door Opener
If all else fails, a full reset may be required. This will erase all remote and keypad settings and restore factory defaults.
How to Reset:
- Locate the “Learn” button.
- Press and hold until the LED turns off (about 6 seconds).
- Reprogram your remotes and keypad as needed.
This can resolve issues caused by software bugs or glitches.
Step 9: Check for Faulty Logic Board or Circuitry
If you’ve tried everything and the door still won’t respond, the issue might be with the logic board (the opener’s brain).
Signs of a Faulty Logic Board:
- Intermittent operation
- Beeping or blinking LED codes
- Random activation or failure
While replacing a logic board is possible, it may be more cost-effective to replace the opener if it’s over 10 years old.
Expert Advice to Troubleshoot Chamberlain Garage Door Opener and Remote That Won’t Work Efficiently
When DIY troubleshooting doesn’t solve the issue, consider these advanced tips from experts:
- Upgrade Firmware: Some newer Chamberlain models allow for firmware updates via MyQ app. Keeping software current can prevent compatibility issues.
- Professional Inspection: If internal components are damaged, a certified technician can diagnose the issue faster.
- Replace Remote or Keypad: Older remotes may fail from internal wear. New universal remotes compatible with Chamberlain are widely available.
Remember, troubleshooting Chamberlain garage door opener and remote that won’t work can save time and money, but safety is always a top priority. Avoid working on electrical components unless you’re confident in your skills.
Preventative Maintenance Tips
To avoid future issues with your Chamberlain garage door system, implement these maintenance habits:
- Test remote and wall controls monthly.
- Clean and align safety sensors regularly.
- Replace batteries at least once a year.
- Lubricate door tracks every six months.
- Check mounting brackets and opener screws for tightness.
Consistent maintenance will extend the life of your opener and minimize emergency breakdowns.
Conclusion
While a non-functioning Chamberlain garage door opener or remote may seem daunting, most problems are easy to fix with a little guidance. Whether it’s as simple as replacing batteries or as complex as reprogramming the system, knowing how to troubleshoot Chamberlain garage door opener and remote that won’t work empowers you to take control of your home’s security and convenience.
By following the steps in this guide, you’ll be well-equipped to handle issues as they arise, saving both time and money on unnecessary repairs. Don’t let a faulty garage door opener disrupt your day — take action now and get your system back in top shape.
Leave a Reply