Your garage door is likely the largest moving object in your home, and it operates several times a day. If you’re using a Chamberlain garage door opener, you already have a reliable piece of technology. However, like all mechanical devices, it requires proper configuration — especially the pressure adjustment. Understanding how to set pressure adjustment on Chamberlain garage door opener is essential for safety, smooth functioning, and avoiding damage to your door or opener.
In this detailed guide, we’ll walk you through everything you need to know about pressure adjustment settings on Chamberlain openers. You’ll learn why it’s necessary, how to set it, and how to troubleshoot common issues along the way.
Read too: How Many Remotes Can A Chamberlain Garage Door Opener Have? Understaanding the Limits and Options
What Is Pressure Adjustment and Why Is It Important?
Pressure adjustment on your garage door opener controls how much force is applied to open or close the garage door. This force setting is also referred to as travel force or force sensitivity.
Why You Need to Adjust It:
- Prevents the door from slamming shut or reversing unexpectedly
- Ensures safety by detecting obstructions
- Avoids strain on the motor and internal components
- Improves overall door balance and movement
- Helps comply with UL 325 safety standards
Without proper pressure settings, your Chamberlain opener might fail to close the door completely or keep reversing, which can be frustrating and even dangerous.
Signs You Need to Adjust the Pressure Setting
Here are some common indicators that suggest it’s time to learn how to set pressure adjustment on Chamberlain garage door opener:
- The door stops halfway when opening or closing
- The door reverses direction for no apparent reason
- You hear unusual grinding noises
- The motor struggles or sounds strained
- The opener lights flash during movement errors
- Door doesn’t fully open or close in one smooth motion
If any of these symptoms sound familiar, the force settings may be misaligned or need recalibration.
Tools You’ll Need
Fortunately, setting the pressure on a Chamberlain garage door opener doesn’t require specialized tools. Here’s what you’ll need:
- A ladder to reach the motor unit
- A flathead screwdriver (for older models)
- Your owner’s manual (for reference)
- Optional: Protective gloves and safety glasses
Types of Chamberlain Garage Door Openers and Force Adjustment
Chamberlain offers several types of openers:
- Chain-drive openers
- Belt-drive openers
- Screw-drive openers
- Wall-mount (Jackshaft) models
- MyQ-enabled smart openers
All these types come with force adjustment features, though the method may vary slightly depending on the model’s year and whether it is mechanical or electronic.
How To Set Pressure Adjustment On Chamberlain Garage Door Opener
This is the heart of the article — let’s dive into the step-by-step instructions for adjusting the pressure on your Chamberlain opener.
Step 1: Identify Your Model
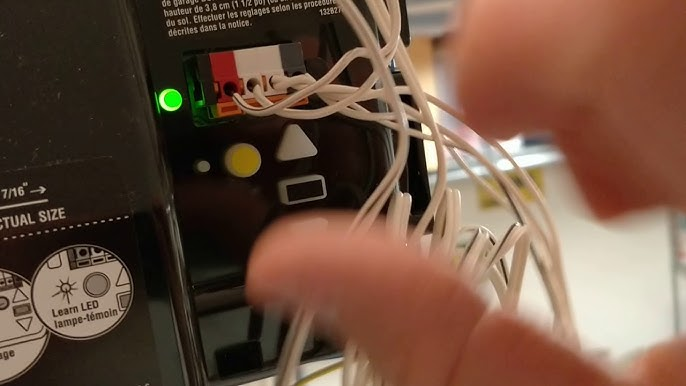
Check the label on the back or side of the motor unit to identify your model. This will help determine whether you need to adjust manual dials or navigate digital programming options.
Older models have screw-type dials, usually marked as “UP FORCE” and “DOWN FORCE.”
Newer models with Security+ 2.0 or MyQ technology use digital settings, usually programmed via the Learn button and garage wall control.
Step 2: Test the Current Settings
Operate the garage door a few times. Observe whether it:
- Stops too early
- Reverses direction suddenly
- Struggles to open or close
This test helps you understand whether you need to increase or decrease the pressure settings.
Step 3: Adjust Force Settings (Mechanical Models)
If your Chamberlain opener has mechanical dials:
- Locate the force adjustment screws on the back or side of the motor unit.
You’ll see two dials:- Up Force – Adjusts the amount of force to open the door.
- Down Force – Adjusts the force needed to close the door.
- Use a flathead screwdriver to make small 1/4-turn adjustments:
- Turn clockwise to increase force.
- Turn counterclockwise to decrease force.
- Test after each adjustment. Press the wall button or remote to open or close the door and see how it behaves.
Repeat as needed until the door moves smoothly without reversing or stopping.
Step 4: Adjust Force Settings (Digital/Electronic Models)
For newer Chamberlain garage door openers with electronic controls:
- Press and hold the “Adjustment” button on the motor unit until the up-arrow begins to flash.
- Press the Up arrow to set how far the door should travel upward. Press “Adjust” again to save.
- Press the Down arrow to set the close travel. Press “Adjust” again to save.
- Once travel is programmed, the unit enters Force Learn Mode.
- Operate the door fully two times (open and close). The system will auto-calibrate pressure based on the weight and resistance of the door.
This method is more precise and safer, as it uses sensors and algorithms to determine the ideal force level.
Safety Tips When Adjusting Pressure
- Never increase the force setting as a shortcut for fixing a stuck or unbalanced door.
- Check the door balance manually by disconnecting the opener and moving the door by hand.
- Make sure photo-eye sensors are aligned and free of dirt or obstructions.
- If the door still malfunctions after pressure adjustment, call a garage door technician to inspect the springs, rollers, and tracks.
Resetting the Pressure Adjustment
If you’ve made too many changes and want to start over:
For Mechanical Models:
- Simply turn both dials to their original midpoint and retest from there.
For Digital Models:
- Unplug the unit for 30 seconds and plug it back in.
- Re-enter Travel and Force Learn Mode as described above.
This will effectively reset the system’s learned pressure memory.
Troubleshooting Common Pressure Adjustment Problems
Door Still Reverses After Adjustment
- Check if photo sensors are misaligned.
- Look for obstructions or warping on the door.
Door Won’t Open Fully
- Increase the Up Force slightly.
- Check for broken springs or roller issues.
Door Slams When Closing
- Decrease the Down Force setting.
- Test safety reverse by placing a 2×4 under the door — it should auto-reverse.
Maintaining Your Opener After Adjustment
Once you’ve learned how to set pressure adjustment on Chamberlain garage door opener, you should perform periodic checks to keep the system in top condition:
- Lubricate rollers, hinges, and springs every 6 months
- Clean and test the photo-eye sensors
- Recheck pressure settings annually
- Monitor for changes in door weight or balance, especially after repairs
When to Call a Professional
If your adjustments don’t resolve the issue, or if you notice any of the following, call a certified garage door technician:
- Loud grinding or squealing noises
- Broken or stretched torsion springs
- Unbalanced or crooked door movement
- Continuous flashing LED indicators
Incorrect force settings can put strain on your opener or cause safety hazards, so never hesitate to seek expert help.
Conclusion
Now that you understand how to set pressure adjustment on Chamberlain garage door opener, you can ensure a smoother, quieter, and safer operation of your garage door system. Whether you’re making a minor tweak or recalibrating the whole setup, a properly adjusted opener not only improves functionality but also extends the life of your entire garage door system.
Make it a habit to test and inspect your door regularly. Small preventive actions today can save you costly repairs tomorrow.
Leave a Reply