How To Replace Belt 411A5250 On Chamberlain Garage Door Opener? Over time, garage door openers undergo wear and tear, especially with components like the belt. One commonly replaced part for Chamberlain garage door openers is the Belt 411A5250. Whether your belt is slipping, broken, or showing signs of wear, replacing it is essential for ensuring smooth and reliable operation of your garage door opener. This comprehensive guide will walk you through the process of replacing Belt 411A5250 on your Chamberlain garage door opener.
In this article, we’ll provide step-by-step instructions, safety tips, and troubleshooting advice to help you complete the replacement efficiently. By the end, you’ll have a better understanding of how to replace this critical part and get your garage door opener running like new again.
Read too: How Many Remotes Can A Chamberlain Garage Door Opener Have? Understaanding the Limits and Options
Why Should You Replace the Belt 411A5250 on Chamberlain Garage Door Opener?
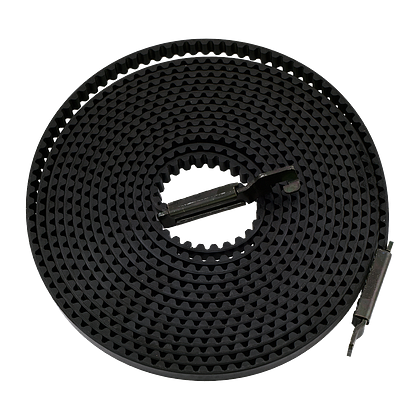
The Belt 411A5250 is a crucial part of the Chamberlain garage door opener system. It connects the motor to the trolley and moves the garage door up and down. Over time, this belt can stretch, wear out, or even snap, leading to poor performance or a non-functional opener. The belt may show signs of damage, such as:
- Visible cracks or fraying
- Slipping or inconsistent movement
- Loud noises while operating
- Complete breakage
If you notice any of these signs, it’s time to replace the belt. By addressing this issue promptly, you prevent further damage to your opener system and avoid costly repairs in the future.
How to Replace Belt 411A5250 on Chamberlain Garage Door Opener: Step-by-Step Guide
Replacing the Belt 411A5250 on your Chamberlain garage door opener is not as complicated as it might sound. Follow these simple steps to get the job done correctly.
1. Gather the Necessary Tools and Materials
Before you begin, ensure that you have the right tools and parts on hand to complete the job. Here’s a list of the tools and materials you’ll need:
- Replacement belt (model 411A5250)
- Socket wrench set
- Ladder (if your opener is mounted high)
- Screwdriver (flathead or Phillips, depending on your opener)
- Tape measure
- Rubber gloves (optional for grip and safety)
- Lubricant (for smooth operation of the new belt)
Once you have everything in place, you’re ready to start the replacement process.
2. Disconnect the Power and Safety First
Before performing any repairs or replacements on your Chamberlain garage door opener, always ensure the power is turned off. You can do this by either unplugging the opener or turning off the circuit breaker that powers it. This will prevent any electrical mishaps or accidental activation of the garage door while you’re working on it.
Additionally, it’s a good idea to wear safety gloves to avoid injury from any sharp parts, especially when handling components like the motor and springs.
3. Release the Trolley from the Belt
The first step in removing the old belt is to disconnect the trolley from the belt. Follow these steps:
- Locate the trolley: This is the part that moves along the rail and connects to the garage door. It’s attached to the belt you’re replacing.
- Release the trolley from the belt: You’ll need to find the release mechanism on the trolley. This can usually be done by either loosening the bolts or simply pulling a latch, depending on your model.
- Pull the trolley away from the belt, allowing you to work on removing the belt from the system.
4. Remove the Old Belt
With the trolley detached, the next step is to remove the old belt. Follow these instructions:
- Locate the bolts: The belt is attached to the motor unit and rail system with bolts or screws. Use a socket wrench or screwdriver to remove these fasteners.
- Loosen and remove: Gently loosen and remove the fasteners holding the belt in place. Be careful not to lose any screws or nuts, as they will be needed for installing the new belt.
- Take out the old belt: Once the fasteners are removed, carefully slide the old belt off the motor unit and rail. You may need to rotate the motor or rail slightly to remove the belt completely.
5. Install the New Belt 411A5250
Now that the old belt is removed, it’s time to install the new Belt 411A5250. Here’s how to do it:
- Align the new belt: Take the new Belt 411A5250 and place it on the motor and rail, aligning it with the same path as the old belt. The belt should fit snugly but not be too tight.
- Attach the belt to the motor: Use the same fasteners that you removed earlier to attach the new belt to the motor unit. Tighten the bolts or screws securely.
- Attach the belt to the trolley: Slide the trolley back onto the new belt and secure it in place, making sure it moves freely along the rail.
- Adjust tension: It’s essential to ensure the new belt has the proper tension. If the belt is too tight, it could cause excessive strain on the opener motor. If it’s too loose, the garage door may not operate smoothly. Adjust the tension until the belt is just right.
6. Test the Garage Door Opener
After the new Belt 411A5250 is installed, it’s important to test the system to make sure everything is working properly:
- Reconnect the power: Plug the opener back in or turn the circuit breaker back on.
- Test the door: Use the wall control or remote to open and close the garage door. Listen for any unusual sounds or vibrations that could indicate the belt is not functioning correctly.
- Check the movement: The garage door should open and close smoothly without any jerking, slipping, or hesitation. If you notice any issues, double-check the belt tension or alignment.
7. Lubricate the Belt and Moving Parts
To ensure smooth and quiet operation, it’s a good idea to apply lubricant to the new belt and other moving parts of the garage door opener. Use a silicone-based lubricant and apply it sparingly to the rail, trolley, and belt. Avoid using grease, as it can attract dirt and debris over time.
Troubleshooting Common Issues After Replacing the Belt
While replacing the belt on your Chamberlain garage door opener is generally a straightforward task, you might encounter a few issues along the way. Here are some common problems and solutions:
1. The Garage Door is Moving Slowly or Unevenly
If the garage door moves slowly or unevenly after replacing the belt, it may be a sign of incorrect belt tension. Check the belt and adjust the tension until the door moves smoothly. If the door is still uneven, inspect the rollers, springs, and tracks for any damage or obstruction.
2. The Belt Slips or Squeaks
A slipping or squeaking belt can occur if the tension is too loose or the belt is not aligned properly. Adjust the belt tension and ensure that the belt is aligned correctly with the rail and motor unit.
3. The Door Won’t Open or Close
If the garage door opener doesn’t respond after replacing the belt, make sure the motor is plugged in and working. Double-check the wiring and ensure that the belt is properly connected to the trolley and motor.
Conclusion
Replacing the Belt 411A5250 on your Chamberlain garage door opener is an essential repair that can extend the life of your opener and restore its performance. With the steps outlined above, you can easily complete the replacement process yourself. Always remember to prioritize safety, use the correct tools, and test the system thoroughly after installation.
By maintaining and replacing worn parts like the Belt 411A5250, you can ensure that your Chamberlain garage door opener continues to operate smoothly and efficiently for years to come.
Leave a Reply