How To Replace Battery In Chamberlain Remote Garage Door Opener? Owning a Chamberlain garage door opener comes with the convenience of remote control access, making it easier to operate your garage door without getting out of your car. However, like all battery-powered devices, the Chamberlain remote garage door opener will eventually need a new battery. If you’re unsure how to replace the battery, this guide will walk you through the process to ensure your remote works smoothly again.
Replacing the battery in your Chamberlain remote garage door opener is a simple task that you can do on your own, saving both time and money. Whether your remote is no longer working or the range has decreased, replacing the battery will restore its functionality. This article will provide you with all the necessary steps, tips, and troubleshooting advice to get your Chamberlain remote garage door opener back in action.
Read too: How Many Remotes Can A Chamberlain Garage Door Opener Have? Understaanding the Limits and Options
Why Do You Need to Replace the Battery in Your Chamberlain Remote Garage Door Opener?
Before we dive into the specifics of how to replace the battery, it’s essential to understand why this task is necessary. Over time, the battery inside your Chamberlain remote garage door opener will deplete. You might notice the following signs indicating that the battery needs to be replaced:
- Unresponsive remote: If your garage door opener no longer responds when you press the button on the remote, it’s time to check the battery.
- Decreased range: If you have to press the button multiple times or get closer to the door to activate it, the battery may be weak.
- Blinking or flashing light: Some Chamberlain remotes have a light indicator that blinks when the battery is low.
When the battery is low or dead, it will prevent the remote from sending a signal to the garage door opener. Replacing the battery ensures that your Chamberlain remote garage door opener continues to work as it should.
How to Replace Battery in Chamberlain Remote Garage Door Opener
Replacing the battery in your Chamberlain remote garage door opener is a straightforward process that can be completed in just a few minutes. Here’s a step-by-step guide to help you through the process.
1. Gather the Necessary Tools and Materials
Before you begin, make sure you have the following items on hand:
- Replacement battery: The most common battery used in Chamberlain remote garage door openers is a CR2032 coin cell battery. However, check the model number of your remote to ensure you get the correct battery.
- Screwdriver (optional): Some remotes may require a small screwdriver to open the battery compartment.
- Pry tool (optional): For some remotes, a plastic pry tool can help to open the case without damaging it.
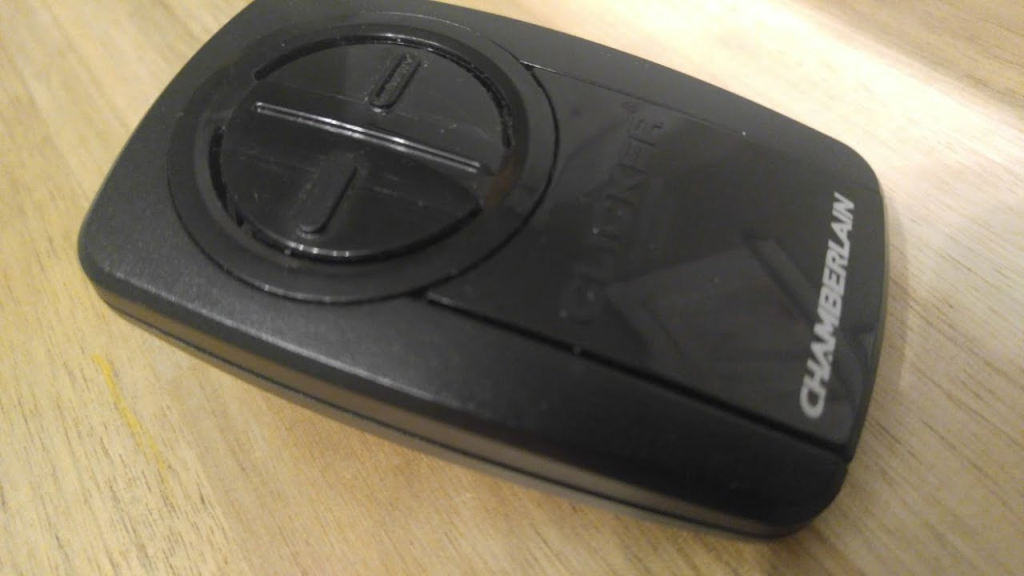
2. Open the Remote Control
The next step is to access the battery compartment. The method of opening your Chamberlain remote garage door opener will depend on the specific model you have. Here’s how to open most Chamberlain remote controls:
- Locate the seam: The remote is usually held together by clips or screws along the edge. Find the seam or edge where the two halves of the remote meet.
- Remove the cover: If there are screws, use a small screwdriver to remove them. If your remote uses clips, gently pry open the remote using a plastic pry tool to avoid damaging the casing.
- Set aside the cover: Once you’ve opened the remote, set the cover aside and expose the battery compartment inside.
3. Remove the Old Battery
With the remote open, it’s time to remove the old battery. The battery will typically be secured in place by a small tab or clip. Here’s how to remove it safely:
- Identify the battery: Look for the CR2032 coin cell or the appropriate model for your remote. Note the orientation of the battery, as you will need to insert the new one in the same direction.
- Remove the battery: Gently pry the battery out of its compartment using your finger or a small tool. Be careful not to damage the battery compartment or the internal components.
4. Insert the New Battery
Now it’s time to install the new battery into your Chamberlain remote garage door opener.
- Check the orientation: Make sure the new battery is installed in the correct orientation. The positive side (marked with a “+”) should face up, and the negative side (marked with a “-”) should face down.
- Place the new battery in the compartment: Gently insert the new battery into the compartment, ensuring it fits snugly and is aligned correctly.
5. Close the Remote Control
Once the new battery is in place, it’s time to reassemble the remote.
- Put the cover back on: Align the cover with the remote and snap or screw it back into place. Ensure that the remote is securely closed to prevent the battery from falling out.
- Test the remote: Before finishing up, press the button on the remote to check if it is working correctly. If the door opens and closes as expected, the battery replacement was successful.
6. Dispose of the Old Battery Properly
Batteries should always be disposed of correctly to avoid harming the environment. Many batteries contain hazardous materials that can be dangerous if improperly disposed of.
- Recycle the old battery: Take the old battery to a local recycling facility or a retailer that accepts used batteries. Many electronics stores offer battery recycling services.
- Check local regulations: Some areas have specific regulations for the disposal of batteries. Check your local guidelines to ensure safe disposal.
Troubleshooting Tips if the Remote Still Isn’t Working
If the remote doesn’t work after replacing the battery, don’t panic. Here are a few things to check:
1. Check the Battery Orientation
Ensure that the new battery is inserted in the correct orientation. The positive side should face up, and the negative side should face down.
2. Test the Remote with a Different Battery
Sometimes, new batteries can be faulty. If the remote still doesn’t work after replacing the battery, try using a different one.
3. Check the Garage Door Opener
It’s possible that the issue lies with the garage door opener itself, not the remote. Make sure the opener is plugged in and functioning properly.
4. Reprogram the Remote
If the battery replacement didn’t fix the problem, the remote might need to be reprogrammed. Follow the instructions in your Chamberlain garage door opener manual to reprogram the remote.
Additional Tips for Maintaining Your Chamberlain Remote Garage Door Opener
To ensure that your Chamberlain remote garage door opener continues to function smoothly, it’s important to perform regular maintenance:
- Check the battery regularly: Even if the remote is working fine, check the battery periodically to ensure it’s not getting low.
- Clean the remote: Over time, dirt and debris can build up inside the remote, affecting its performance. Clean the remote periodically with a soft cloth.
- Keep the opener in good condition: Maintain your garage door opener by lubricating the moving parts and checking the door balance regularly.
- Reprogram if necessary: If your remote stops working, consider reprogramming it or replacing it if it’s faulty.
Conclusion
Replacing the battery in your Chamberlain remote garage door opener is a simple yet important task that ensures your system continues to work efficiently. By following this step-by-step guide, you can replace the battery quickly and easily, restoring the functionality of your remote. Remember to keep an eye on the battery life and perform regular maintenance to extend the life of your remote and garage door opener.
Leave a Reply