How To Replace Batteries In A Chamberlain Garage Door Opener? If you own a Chamberlain garage door opener, you know how essential it is to keep your system running smoothly. One common issue that many people face is the need to replace the batteries in their Chamberlain garage door opener. While it may seem like a simple task, replacing the batteries can sometimes be tricky, especially if you’re unsure of where to start or what kind of battery is required.
In this article, we will walk you through the steps to successfully replace the batteries in your Chamberlain garage door opener. We’ll also discuss common troubleshooting tips, tools you may need, and why it’s important to replace the batteries regularly to keep your system functioning properly.
Read too: How Many Remotes Can A Chamberlain Garage Door Opener Have? Understaanding the Limits and Options
Why Do You Need to Replace the Batteries in a Chamberlain Garage Door Opener?
The Chamberlain garage door opener uses a battery backup system to keep the door operating in case of a power outage. When the power goes out, the opener will automatically switch to the battery backup, allowing you to continue using the garage door without interruption. If the battery begins to lose charge or dies completely, your garage door may fail to open or close properly.
Here are some signs that it’s time to replace the batteries in your Chamberlain garage door opener:
- The opener light blinks or flashes: If you notice the light on your opener blinking or flashing, this is often a sign that the battery needs to be replaced.
- The door doesn’t open: If the door doesn’t open or close correctly when you press the remote, the battery might be low.
- The battery backup light is off: If the backup light is no longer lit, it’s likely that the battery is no longer functional.
- The opener is making unusual sounds: Sometimes, a low battery will cause the motor to struggle or produce a buzzing sound when attempting to operate.
Replacing the battery will ensure that your Chamberlain garage door opener operates smoothly and that the backup system remains functional in the event of a power outage.
How to Replace Batteries in a Chamberlain Garage Door Opener
Replacing the battery in your Chamberlain garage door opener is a relatively simple task that you can do yourself. Follow these steps to ensure a quick and efficient battery replacement:
1. Gather the Necessary Tools and Materials
Before you begin, it’s important to have all the necessary tools and materials on hand. You’ll need:
- New battery: Ensure you purchase the correct battery model for your Chamberlain garage door opener. The battery used in most Chamberlain openers is a 12V rechargeable battery.
- Screwdriver: A flathead or Phillips screwdriver will be needed to remove the cover.
- Gloves: Wearing gloves can help prevent any injuries or battery acid from coming in contact with your skin.
- Flashlight: In case you need extra lighting to locate the battery or its compartment.
- Replacement battery charger (if applicable): Some models may require a battery charger, so make sure you have this handy.
2. Disconnect the Power
Before you start, it’s essential to ensure safety. Disconnecting the power is crucial to prevent any electrical hazards while replacing the battery.
- Unplug the garage door opener: Unplugging the device is the best way to ensure safety during the process. This will also prevent any accidental activation of the door while you’re working.
- Turn off the circuit breaker: If your garage door opener is hardwired, you may need to turn off the breaker to cut power to the system.
3. Locate the Battery Compartment
Next, you’ll need to locate the battery compartment on your Chamberlain garage door opener. The location of the compartment may vary depending on the model you own, but it is typically found on the back or bottom of the motor unit.
To find the battery compartment:
- Consult the user manual: If you’re unsure where the battery compartment is, consult your Chamberlain garage door opener’s manual for specific instructions.
- Look for a cover: The battery compartment will be behind a cover, which you will need to remove. The cover is typically secured with screws, so use your screwdriver to remove them.
4. Remove the Old Battery
Once you’ve located the battery compartment and removed the cover, it’s time to remove the old battery.
- Disconnect the battery cables: You’ll see two cables attached to the battery terminals. Gently disconnect the wires by loosening the screws or clips holding them in place. Be careful not to damage the wires.
- Take out the old battery: Once the wires are disconnected, remove the old battery from the compartment. If it’s stuck, gently wiggle it until it comes free.
5. Install the New Battery
Now that the old battery is removed, it’s time to install the new one.
- Check the battery orientation: Make sure you place the new battery into the compartment with the correct orientation. Most batteries will have a “+” and “-” symbol indicating the positive and negative terminals. Ensure that the positive terminal connects with the red wire and the negative terminal with the black wire.
- Connect the battery wires: Attach the wires to the new battery terminals. Secure the connections with the screws or clips, making sure they are tight and secure.
- Test the battery: Before closing the compartment, test the battery by pressing the remote or wall button to see if the garage door opener responds. If the door moves, the battery is installed correctly.
6. Reassemble the Opener
Once the new battery is in place and functioning, it’s time to put everything back together.
- Replace the cover: Secure the battery compartment cover back into place and screw it in tightly. Make sure the cover is properly aligned and fully sealed.
- Plug the opener back in: Reconnect the opener to the power source by plugging it back into the electrical outlet or turning the circuit breaker back on.
7. Test the Garage Door Opener
With everything reassembled, it’s time to test your Chamberlain garage door opener to ensure everything is working correctly.
- Use the remote: Press the remote control button to see if the garage door opens and closes smoothly. If it does, the battery replacement was successful.
- Check the wall control: Also test the wall control button to ensure that it operates the door as expected.
- Check the battery backup: If your model has a battery backup, test that by temporarily turning off the power. The garage door opener should still work with the new battery.
8. Dispose of the Old Battery Properly
Don’t forget to dispose of the old battery properly. Many batteries contain hazardous materials that can be harmful to the environment if not disposed of correctly. Check your local recycling program for guidance on how to recycle or dispose of the battery.
Additional Tips for Maintaining Your Chamberlain Garage Door Opener
- Regularly check the battery: Even if your Chamberlain garage door opener is working well, it’s important to check the battery periodically to ensure it’s still holding a charge.
- Keep the opener clean: Dust and debris can accumulate in the opener, affecting its performance. Clean the motor and other components regularly to ensure smooth operation.
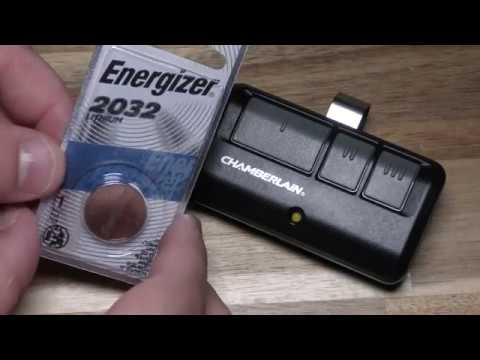
- Inspect the remote: The remote control’s battery might also need replacement. If the door isn’t responding, it could be an issue with the remote.
- Keep the door tracks lubricated: Regular lubrication of the door tracks will keep the opener functioning properly and reduce wear on the motor and other components.
Conclusion
Replacing the batteries in your Chamberlain garage door opener is a simple yet essential task to ensure that your system continues to operate smoothly. By following this guide, you can easily replace the battery and enjoy reliable performance, even during power outages. Remember to always follow safety protocols, use the correct replacement battery, and test the system after installation.
If you experience any issues, refer to your user manual or contact a professional for further assistance. Regular maintenance and timely battery replacements will keep your Chamberlain garage door opener functioning optimally for years to come.
Leave a Reply