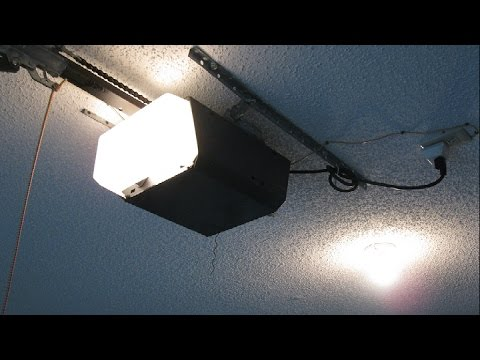
The Chamberlain garage door opener is a reliable and essential part of many homes. It’s designed to make garage access convenient, but like any piece of technology, it requires occasional maintenance. One common task homeowners face is removing the light cover for cleaning, bulb replacement, or other maintenance needs. If you’re wondering how to remove the light cover from your Chamberlain garage door opener, you’re in the right place.
Removing the light cover from your Chamberlain garage door opener isn’t difficult, but it’s important to follow the correct steps to avoid damaging the cover or the opener itself. This guide will walk you through the process step-by-step, ensuring that you can remove the light cover safely and efficiently. Let’s get started.
Why You Might Need to Remove the Light Cover
Before we dive into the steps for removing the light cover from your Chamberlain garage door opener, let’s take a look at why you might need to do so. There are a few common reasons:
- Replacing the Light Bulb: Over time, the bulb in your Chamberlain garage door opener may burn out, requiring a replacement. To do this, you’ll need to access the light cover.
- Cleaning the Light Area: Dust and debris can accumulate around the light cover, affecting both the light’s brightness and the overall function of the garage door opener. Cleaning the area behind the cover is necessary for proper maintenance.
- Repairs and Upgrades: If you’re upgrading the light in your opener to a more energy-efficient LED bulb or making any repairs to the wiring or light socket, removing the cover is essential.
- Replacing the Light Cover: In some cases, the light cover itself may become damaged. If this happens, you’ll need to remove the old cover and install a new one.
How To Remove Light Cover From Chamberlain Garage Door Opener: A Step-by-Step Guide
Now that we know why you might need to remove the light cover from your Chamberlain garage door opener, let’s walk through the steps to do so.
Step 1: Ensure the Power Is Turned Off
Before you start working with any electrical component, safety is the top priority. Always ensure that the power to the garage door opener is turned off before proceeding.
- Unplug the opener: Locate the power cord and unplug the opener from the electrical outlet.
- Switch off the circuit breaker: If your Chamberlain opener is wired directly to the power source, turn off the circuit breaker to cut power to the opener.
- Verify power is off: Double-check that the light is off and no electrical components are functioning. This is an important step to prevent electrical shocks or accidents.
Step 2: Identify the Type of Light Cover
Chamberlain garage door openers come in various models, and the method for removing the light cover can vary. The most common types of light covers are:
- Screw-on Covers: These light covers are secured with screws. You’ll need a screwdriver to remove the screws.
- Snap-on Covers: These covers are designed to snap into place and can be removed by gently prying them off.
- Twist-and-lock Covers: Some Chamberlain models use a twist-and-lock mechanism. To remove these covers, you’ll need to twist the cover counterclockwise.
Determine which type of cover your model uses. The Chamberlain manual for your specific opener model should provide more details on the exact type of cover.
Step 3: Remove the Screws (For Screw-on Covers)
If your Chamberlain garage door opener light cover is secured with screws, follow these steps:
- Use a screwdriver (either Phillips or flathead, depending on the type of screws) to remove the screws securing the light cover.
- Once the screws are removed, gently pull the cover away from the opener unit. Be cautious not to apply too much force, as this could damage the cover or opener.
Step 4: Remove the Snap-on Cover
For models with a snap-on light cover, the process is simple:
- Find a gap along the edges of the cover. You may use a plastic pry tool or a flathead screwdriver to create a slight gap between the cover and the opener.
- Gently pry the cover away from the opener. Start at one corner or side and work your way around to avoid cracking or damaging the cover.
- Once the cover is loose, carefully remove it from the opener.
Step 5: Remove the Twist-and-lock Cover
For twist-and-lock light covers, the process involves:
- Grasp the cover firmly with both hands.
- Twist the cover counterclockwise until it loosens.
- Once it’s loose, carefully remove the cover.
Step 6: Replace or Clean the Bulb
Once the light cover is removed, you can proceed with the task you set out to accomplish:
- Replace the light bulb: If the bulb is burned out or damaged, unscrew the bulb and replace it with a new one. Make sure to use a compatible bulb for your Chamberlain garage door opener.
- Clean the area: Use a soft cloth or microfiber towel to clean the light socket, bulb area, and surrounding space to remove dust, dirt, and cobwebs.
- Inspect for damage: Check for any signs of wear or damage to the wiring or light socket. If you notice anything unusual, you may want to call a professional to address the issue.
Step 7: Reinstall the Light Cover
After replacing or cleaning the bulb, you can reinstall the light cover. The process will depend on the type of cover:
- For screw-on covers: Align the cover with the opener and secure it with the screws you removed earlier.
- For snap-on covers: Line up the edges of the cover and gently snap it back into place.
- For twist-and-lock covers: Align the cover with the opener and twist it clockwise to lock it back into place.
Common Issues and Troubleshooting Tips
While removing and replacing the light cover is typically a straightforward task, there may be a few issues that arise. Here are some common problems and troubleshooting tips:
1. The Light Cover Won’t Come Off
If the cover seems stuck, do not force it off, as this could break the cover. Instead:
- Look for hidden screws: Sometimes, a cover may have screws that are not immediately visible. Check the edges and underside of the cover for hidden screws.
- Try a plastic pry tool: If the cover is a snap-on style, using a plastic pry tool instead of a metal one will reduce the risk of damaging the cover.
2. The Light Socket Is Damaged
If the light socket or wiring appears damaged, it’s important to replace the damaged components. Continuing to use a faulty light socket could lead to electrical issues. If you’re not comfortable with electrical work, consider hiring a professional to replace the parts.
3. Replacing the Bulb Doesn’t Solve the Issue
If replacing the light bulb doesn’t restore the lighting function, the issue may lie in the wiring or control board. Check the connections and consider calling a professional if necessary.
Conclusion
Knowing how to remove the light cover from your Chamberlain garage door opener is an essential skill for any homeowner. Whether you’re replacing a light bulb, cleaning the area, or performing maintenance, following these simple steps will help you complete the task safely and effectively. Always remember to turn off the power before working with electrical components, and take care when handling parts to avoid damaging your opener.
By maintaining your Chamberlain garage door opener, you’ll ensure its longevity and smooth operation. If you run into any issues or need assistance, don’t hesitate to consult the user manual or contact a professional.
Leave a Reply