Programming the wall button for your Chamberlain garage door opener is a crucial step to ensure smooth, reliable operation of your garage door. Whether you’ve just installed a new opener or need to replace or reprogram the wall control button, knowing how to program Chamberlain garage door opener wall button is essential.
Many homeowners overlook the importance of properly setting up the wall button, which can cause frustration when the door won’t respond or works inconsistently. This comprehensive guide will walk you through the entire process, from identifying your button and opener model to step-by-step programming instructions and troubleshooting tips.
By the end, you’ll be confident in managing your Chamberlain garage door opener wall button programming and optimizing your garage door’s performance.
Read too: How Many Remotes Can A Chamberlain Garage Door Opener Have? Understaanding the Limits and Options
Understanding the Chamberlain Garage Door Opener Wall Button
Before diving into programming, it’s important to understand what the wall button does and the types commonly used with Chamberlain openers.
What is the Wall Button?
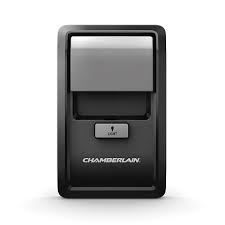
The wall button is a wired control panel mounted inside your garage, typically near the door leading into the home. It allows you to open, close, or stop the garage door manually from inside the garage. Unlike remote controls, the wall button communicates directly with the garage door opener motor unit through wires.
Types of Chamberlain Wall Buttons
- Basic Push-Button: A simple button that sends a signal to open or close the door.
- Wall Console with Light and Lock: Includes controls for light, lock (vacation mode), and sometimes additional features.
- Wireless Wall Buttons: Some newer models include wireless options but still require programming.
Knowing your button type will help in the programming and troubleshooting process.
How To Program Chamberlain Garage Door Opener Wall Button – Step-by-Step
Programming your Chamberlain wall button involves pairing the wired control panel with the garage door opener motor unit so it can communicate properly.
What You’ll Need:
- Chamberlain garage door opener motor unit
- Wall button or wall console
- Ladder (if needed)
- Screwdriver (to open opener panel if necessary)
Step 1: Power Off the Garage Door Opener
For safety, unplug the garage door opener or turn off the circuit breaker to prevent accidental activation during programming.
Step 2: Locate the Garage Door Opener Terminal
The wired wall button connects directly to terminals on the motor unit. Usually, the terminals are labeled “Push Button”, “Wall Control”, or simply “P.B.”
To access:
- Open the light lens cover or remove the motor unit cover if necessary.
- Look for two small screws or clips where the wall button wires connect.
Step 3: Identify the Wall Button Wires
Your wall button has two wires (usually red and white, but sometimes other colors). These wires run from the wall button to the garage door opener.
- If replacing or installing a new button, strip about 1/2 inch of insulation off the wire ends.
- Ensure wires are in good condition with no corrosion or damage.
Step 4: Connect the Wall Button to the Opener Terminals
Loosen the screws on the terminal block.
- Insert one wire into each terminal screw.
- Tighten the screws securely to ensure a solid connection.
If the terminals are labeled, make sure the wires connect to the correct terminals as per your opener’s manual.
Step 5: Test the Button Function Before Programming
Plug the garage door opener back in or turn on the breaker.
- Press the wall button.
- The door should open or close immediately.
- If it doesn’t, double-check the wiring connections and try again.
Step 6: Program Additional Features (If Applicable)
Some Chamberlain wall consoles have additional features such as light control or vacation lock mode. These may require pressing specific buttons or a sequence to activate.
Refer to your specific wall console’s manual for details on programming these extra functions.
Step 7: Reset or Reprogram the Wall Button (If Not Working)
If the wall button was previously programmed but isn’t working correctly, a reset or reprogramming may be needed.
- Locate the “Learn” button on the garage door opener motor unit (usually near the antenna wire).
- Press and hold the Learn button for about 6 seconds until the indicator light goes out (this clears all remote and wall control codes).
- Press the wall button once—this should reprogram the opener to recognize the wall control.
Troubleshooting Common Wall Button Issues
Even after programming, problems can arise. Here’s how to fix common issues related to your Chamberlain garage door opener wall button:
1. Wall Button Doesn’t Work
- Check wiring connections for looseness or corrosion.
- Replace the wall button if the switch itself is faulty.
- Confirm power to the opener unit.
- Reset and reprogram as described.
2. Door Opens or Closes Randomly
- Interference from other wireless devices (if using a wireless button).
- Replace wall button wiring to prevent short circuits.
- Check for stuck button or faulty wall button contacts.
3. Door Opens But Won’t Close
- Check safety sensors alignment.
- Make sure nothing obstructs the door path.
- Test wall button to see if it triggers the stop function.
Additional Tips for Maintaining Your Chamberlain Wall Button and Opener
- Periodically inspect the wiring for damage or wear.
- Keep the wall button clean and free of dust.
- Replace batteries for wireless wall buttons regularly.
- Keep the opener firmware updated via the MyQ app (if supported).
Benefits of Properly Programming Your Wall Button
- Safety: Correct programming ensures you have full control to stop the door in an emergency.
- Convenience: Instant manual control inside the garage.
- Security: Features like vacation lock mode prevent unwanted entry.
- Durability: Proper wiring and programming reduce wear on the motor unit.
Conclusion
Knowing how to program Chamberlain garage door opener wall button is vital for maintaining full control over your garage door. Whether you’re installing a new wall button, replacing a broken one, or troubleshooting an existing system, this guide covers every step with clear instructions.
By following the outlined steps, testing thoroughly, and troubleshooting carefully, you can ensure your garage door wall button works smoothly, adding convenience and security to your home.
If you have questions about specific Chamberlain models or advanced programming options, feel free to ask! Your garage door opener’s manual and the MyQ app also provide helpful resources.
Leave a Reply