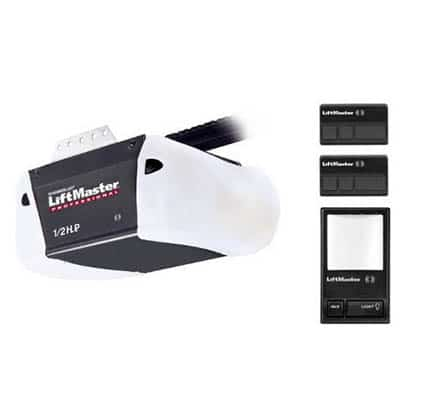
How To Program A Chamberlain Liftmaster Professional Garage Door Opener? Garage door openers are essential for modern homeowners, offering convenience, security, and ease of access to your garage. The Chamberlain Liftmaster Professional Garage Door Opener is a highly reliable system used in homes and businesses. With features such as strong performance, security, and ease of use, this garage door opener is a popular choice.
However, to fully enjoy its capabilities, it’s crucial to understand how to program a Chamberlain Liftmaster Professional Garage Door Opener. Whether you’re setting it up for the first time or adding a new remote, proper programming ensures your system works seamlessly.
In this article, we’ll walk you through the step-by-step process of programming your Chamberlain Liftmaster garage door opener. You’ll learn everything you need to know to successfully sync your remote control, keypad, and other devices with the opener for smooth operation.
Why Is Programming Your Chamberlain Liftmaster Garage Door Opener Important?
Programming your Chamberlain Liftmaster garage door opener is essential because it ensures that all the devices (remote controls, keypads, and wireless systems) communicate effectively with the opener. This process enables you to operate your garage door effortlessly and securely. Additionally, proper programming:
- Prevents unauthorized access by ensuring that only programmed remotes can open the door.
- Allows you to customize settings for remote control, wireless keypads, and security features.
- Helps maintain the safety sensors, auto-reverse mechanisms, and other essential functions.
Without programming, your opener may not respond to commands, or it may be vulnerable to interference from other devices.
How To Program A Chamberlain Liftmaster Professional Garage Door Opener: A Step-by-Step Guide
Now that you understand the importance of programming, let’s walk through the specific steps needed to program your Chamberlain Liftmaster Professional Garage Door Opener. Whether you need to program a new remote or sync a keypad, these instructions will ensure your opener is set up properly.
Step 1: Check the Opener’s Installation
Before beginning the programming process, ensure that your Chamberlain Liftmaster garage door opener is correctly installed. This means that the opener’s motor unit should be securely mounted on the ceiling, and all the connecting components, including the door arm, safety sensors, and tracks, should be properly aligned.
It’s also important to make sure the opener is plugged in, and the door itself moves freely without obstruction. If any part of the installation is incorrect, it could affect the programming process.
Step 2: Identify the Learn Button on Your Chamberlain Liftmaster Opener
The programming process for your Chamberlain Liftmaster Professional Garage Door Opener relies on a small button called the “Learn” button. This button is typically located on the motor unit of the opener, near the antenna. It’s often located on the back or side of the opener and may be colored red, green, or yellow.
Pressing the Learn button activates the programming mode, allowing your opener to sync with the remote control, keypad, or other devices. Once pressed, the LED light near the button will begin to flash or stay on, signaling that the opener is ready to learn new devices.
Step 3: Program Your Remote Control
To program your remote control, follow these steps:
- Press the Learn Button: Locate the Learn button on the motor unit of the opener and press it once. The LED light next to the button should begin flashing, indicating that the opener is in programming mode.
- Press the Remote Control Button: Within 30 seconds of pressing the Learn button, press and hold the button on your remote that you want to use to operate the garage door. Hold the button until the opener’s light blinks or you hear a clicking sound. This means the remote has been successfully programmed.
- Test the Remote: After programming, test the remote by pressing the button to see if the garage door opens or closes. If the door responds, the programming was successful.
Step 4: Program Your Wireless Keypad (Optional)
If you wish to program a wireless keypad, follow these steps:
- Press the Learn Button: Just like with the remote control, press the Learn button on the motor unit. The LED light should start flashing, indicating the opener is in programming mode.
- Enter Your PIN on the Keypad: On your wireless keypad, enter a four-digit PIN of your choice (typically, the default PIN is 1234). Once entered, press the “Enter” button on the keypad.
- Wait for Confirmation: The opener will confirm the programming by blinking its lights or producing a clicking sound.
- Test the Keypad: Test the keypad by entering the PIN and pressing “Enter.” If the garage door opens or closes, your keypad has been successfully programmed.
Step 5: Program Additional Remotes or Devices
If you need to program more than one remote or other devices like a vehicle visor remote, the process is the same as the steps mentioned above:
- Press the Learn Button: Press the Learn button to enter programming mode.
- Press the Remote or Device Button: Press the corresponding button on the remote or device you want to program.
- Wait for Confirmation: The opener will blink its lights or produce a clicking sound to confirm successful programming.
You can repeat this process for as many remotes and devices as needed.
Step 6: Adjust Travel Limits (Optional)
If you notice that the door is not opening or closing properly, you may need to adjust the travel limits. These settings control the maximum height the door opens and the minimum point it closes. Adjusting the travel limits ensures the door opens and closes fully without causing damage.
To adjust the limits:
- Locate the Limit Adjustment Screws: The limit adjustment screws are located on the motor unit of the opener.
- Turn the Screws: Turn the screws to increase or decrease the door’s opening and closing range.
- Test the Door: After making adjustments, test the door by operating it with the remote control or keypad to ensure it opens and closes correctly.
Step 7: Test the Entire System
After programming the remote, keypad, and making any necessary adjustments, it’s time to test the system. Check the following:
- Remote Control Functionality: Ensure that the remote control opens and closes the door as expected.
- Keypad Functionality: Test the keypad to ensure it’s working properly.
- Safety Sensor Alignment: Confirm that the safety sensors are aligned correctly and are functioning by checking that the door reverses automatically when an object is detected.
Troubleshooting Common Issues
While programming your Chamberlain Liftmaster Professional Garage Door Opener is usually a simple process, sometimes issues may arise. Here are some common problems and their solutions:
- Remote Not Responding: If your remote isn’t responding, ensure the batteries are fresh. Try reprogramming the remote or ensure you pressed the Learn button properly.
- Keypad Not Working: Double-check that you entered the correct PIN and that the keypad is within range. Make sure the batteries in the keypad are also new.
- Door Not Closing or Opening Fully: Check if the travel limits need adjustment. Ensure that the door is balanced and that there are no obstructions in the tracks.
Conclusion
Programming your Chamberlain Liftmaster Professional Garage Door Opener ensures that your garage door system works smoothly and securely. By following this easy step-by-step guide, you can quickly program your remote, keypad, and other devices, and enjoy the full benefits of a properly set-up garage door opener.
With the right programming, you’ll experience enhanced security, convenience, and control over your garage door. If you encounter any issues, the troubleshooting tips provided can help you resolve most common problems. Now, you can enjoy the peace of mind that comes with knowing your garage is securely accessible at the push of a button.
Leave a Reply