If you’ve recently purchased or inherited a Chamberlain 953Estd remote and are unsure how to set it up with your garage door opener, you’re not alone. Programming garage door remotes can feel a little intimidating, especially when you’re dealing with an unfamiliar model. But don’t worry—this guide will walk you through how to program a Chamberlain garage door opener model 953Estd step by step, even if you’ve never done it before.
Whether you’re installing a new remote or reprogramming an existing one, we’ll make the entire process quick and simple. Let’s dive into this comprehensive guide to get your remote up and running in no time.
Read too: How Many Remotes Can A Chamberlain Garage Door Opener Have? Understaanding the Limits and Options
What Is the Chamberlain 953Estd?
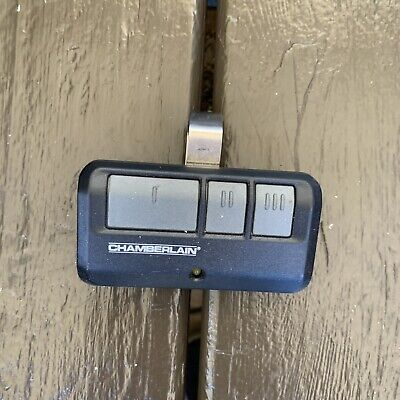
The Chamberlain 953Estd is a three-button remote control compatible with Chamberlain garage door openers that use Security+® rolling code technology. This remote can control up to three different garage doors or gates and is known for its reliability, compact design, and secure transmission.
It works with openers that have a purple “Learn” button, typically found on units manufactured after 2005. If you’re not sure whether your opener is compatible, don’t worry—we’ll show you how to check.
Why You Might Need to Program or Reprogram Your Remote
There are a variety of scenarios where you may need to learn how to program a Chamberlain garage door opener model 953Estd:
- You’ve bought a new remote
- Your current remote stopped working
- You changed your garage door opener
- The original settings were lost during a power outage
- You’re adding a second or third door to the same remote
Regardless of the reason, the programming process is fast, easy, and requires no technical background.
Tools You’ll Need
To begin, make sure you have the following:
- The Chamberlain 953Estd remote
- A ladder (to reach the garage door opener unit)
- Access to the garage door opener motor
- Knowledge of the “Learn” button location on your opener
How To Program A Chamberlain Garage Door Opener Model 953Estd – Step-by-Step Instructions
Follow these steps carefully to program your 953Estd remote successfully.
Step 1: Locate the “Learn” Button on the Garage Door Opener
- Use a ladder to reach the garage door opener motor, which is mounted on the ceiling of your garage.
- On the back or side of the unit, you’ll see a small, colored button labeled “Learn”. For the 953Estd, the Learn button should be purple.
- Near the button, you may also see a small LED light.
Tip: The Learn button is usually hidden behind a light lens cover or small panel.
Step 2: Clear the Memory (Optional)
If you want to start fresh, you can erase all existing codes:
- Press and hold the Learn button for 6 seconds until the LED turns off.
- This action clears all previously programmed remotes and keypads.
Warning: If others in your household are using remotes, they’ll need to be reprogrammed.
Step 3: Press the “Learn” Button
- Quickly press and release the purple Learn button on the garage door opener.
- The LED next to it will light up and stay on for 30 seconds, indicating that the system is ready to accept a new code.
Step 4: Program the 953Estd Remote
- Within 30 seconds of pressing the Learn button, press and hold one of the buttons on your 953Estd remote that you want to assign to that door.
- Hold the button for about 3–5 seconds, or until the garage door opener light blinks or you hear a click sound.
- Release the button.
That’s it! You’ve successfully programmed the remote.
Step 5: Test the Remote
- Press the same button on your 953Estd again.
- The garage door should open or close.
- Repeat the process for any additional doors or buttons.
Troubleshooting Programming Issues
If you followed the steps above but the remote still doesn’t work, here are some common problems and solutions:
Problem: The Garage Door Doesn’t Respond
- Check if the Learn button is the correct color (must be purple for the 953Estd).
- Make sure you’re pressing the remote button within 30 seconds of hitting the Learn button.
- Try repeating the programming steps more slowly.
Problem: Light on Opener Doesn’t Blink
- Make sure you pressed the Learn button firmly.
- Replace the remote battery if the signal is weak.
Problem: The Remote Suddenly Stopped Working
- Power outages or surges may erase programming—just reprogram it.
- Inspect the remote for physical damage or moisture exposure.
Additional Tips for Effective Programming
Here are some extra tips to help ensure a smooth process when learning how to program a Chamberlain garage door opener model 953Estd:
- Label each button on your remote if you’re programming multiple doors.
- Always test the remote while standing at a safe distance.
- Store your ladder in a convenient location for future reprogramming needs.
- Keep a spare battery handy—most issues are caused by low battery power.
Safety Guidelines
When programming or testing the garage door opener:
- Make sure the door’s path is clear of people, pets, or objects.
- Disconnect power from the opener if you need to work inside the housing.
- Never attempt to repair opener components unless you’re a trained technician.
Safety first!
Frequently Asked Questions
Q: Is the 953Estd compatible with LiftMaster or Craftsman?
A: Yes, as long as the opener uses Security+ technology and a purple Learn button, it’s compatible.
Q: Can I use one remote for multiple doors?
A: Yes, the 953Estd has three programmable buttons, perfect for controlling up to three separate openers.
Q: How do I reset the remote?
A: While you can’t “reset” the remote itself, you can erase its connection from the opener using the Learn button.
Q: My opener has a yellow button—can I use this remote?
A: Unfortunately, no. The 953Estd only works with openers that have a purple Learn button.
Final Thoughts
Learning how to program a Chamberlain garage door opener model 953Estd is easier than you might think. With just a few tools and about 10 minutes, you’ll have your remote up and running. This remote is not only secure and reliable but also a perfect fit for homeowners who need control over multiple doors from one compact device.
Whether you’re replacing an old remote or syncing a new one, this guide provides everything you need to know to complete the process successfully and safely.
So grab your ladder and remote, and enjoy the convenience of smart, secure garage access today.
Leave a Reply