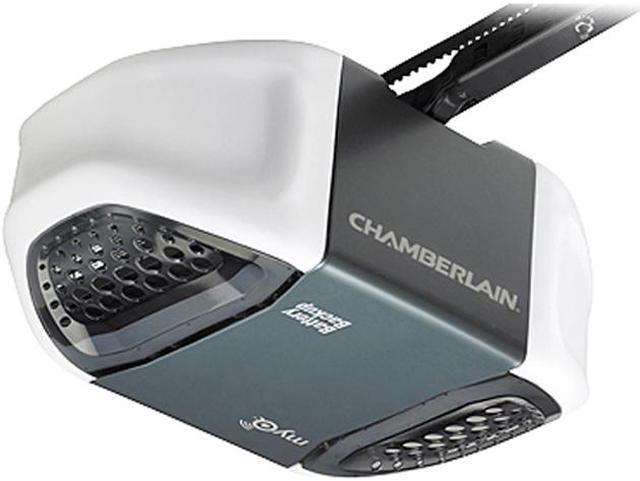
Garage door openers have come a long way, and one of the top contenders for quiet operation and smart technology integration is the Chamberlain WD962KEV Whisper Drive garage door opener. This model combines reliability, safety, and modern convenience into one powerful unit, and while installation may seem intimidating, with the right guide, it’s something a dedicated DIYer can handle confidently.
This article will walk you through how to install Chamberlain WD962KEV Whisper Drive garage door opener, step by step. From unboxing to the final safety test, we’ve got you covered with everything you need to know to get your system up and running.
Read too: How Many Remotes Can A Chamberlain Garage Door Opener Have? Understaanding the Limits and Options
Why Choose the Chamberlain WD962KEV?
Before we dive into the actual installation steps, let’s talk about why the Chamberlain WD962KEV stands out:
- Whisper Drive Technology: Belt-driven mechanism ensures ultra-quiet operation—perfect for attached garages.
- Battery Backup: Operates even during a power outage.
- MyQ Smart Control: Monitor and control your garage door from your smartphone.
- Timer-to-Close Feature: Automatically closes the door after a pre-set time.
- Motion-detecting Control Panel: Turns on lights automatically when you enter the garage.
Tools and Materials You’ll Need
Before you begin the installation, gather these tools to ensure a smooth process:
Required Tools:
- Cordless drill and drill bits
- Stepladder
- Level
- Socket wrench set
- Adjustable wrench
- Screwdrivers (Phillips and flathead)
- Measuring tape
- Pliers
- Safety glasses
- Stud finder (optional)
Included Components (Check Your Box):
- Motor unit
- Rail assembly
- Trolley
- Belt drive system
- Safety sensors
- Wall control panel
- Door bracket
- Hanging straps
- Remote controls
- Hardware pack
Safety First
Always prioritize safety when installing mechanical or electrical components:
- Disconnect power to the garage area.
- Wear safety glasses.
- Don’t attempt installation alone—many parts are heavy or awkward to hold.
- Never operate a garage door opener with an improperly balanced or damaged door.
How To Install Chamberlain Wd962Kev Whisper Drive Garage Door Opener
Now, let’s walk through the full installation process of the Chamberlain WD962KEV Whisper Drive garage door opener.
1: Assemble the Rail and Belt System
- Lay Out the Rail Sections: Identify each piece and connect them according to the manual.
- Insert the Trolley: This is the part that will move along the rail to lift and lower the door.
- Thread the Belt: Loop it through the rail system, around the pulley, and onto the sprocket.
- Tension the Belt: Adjust using the tension nut until the belt is taut but not too tight.
2: Attach the Rail to the Motor Unit
- Align the end of the rail with the motor unit and fasten using the bolts provided.
- Make sure the connection is secure, as this forms the backbone of the entire operation.
3: Mount the Header Bracket
- Use a level to mark the center point of the garage door on the wall above the opening.
- Install the header bracket into a solid framing member using lag screws.
- Make sure the bracket is perfectly horizontal for optimal function.
4: Position and Hang the Opener
- Insert the Rail into the Header Bracket.
- Raise the Motor Unit into position and support it with temporary braces or a helper.
- Install Hanging Brackets to suspend the motor from the ceiling joists. Ensure everything is level and tightly secured.
5: Connect the Door Arm
- Attach the door bracket to the top of the garage door.
- Connect the straight and curved door arms from the bracket to the trolley.
- Make sure there is a slight bend in the arm to avoid binding during operation.
6: Install the Safety Sensors
- Mount the sensors on each side of the garage door about 6 inches above the floor.
- Run the wiring along the wall and ceiling to the opener motor unit.
- Connect wires according to the provided color-coded terminals.
- Ensure sensors are aligned—solid LED lights indicate proper alignment.
7: Wire the Wall Control Panel
- Mount the control panel at a convenient height near the entry door.
- Route the wire to the opener and connect it.
- Use cable staples to keep the wire neat and out of harm’s way.
8: Power and Program the Opener
- Plug in the motor to a grounded outlet.
- Set travel limits using the “Up” and “Down” buttons on the motor housing.
- Program Remote Controls using the Learn button.
- Test Auto-Reverse and Sensor Functions to ensure safe operation.
Additional Setup Features
Enabling MyQ Smartphone Control
- Download the MyQ app and create an account.
- Follow the pairing instructions to connect the opener to your home Wi-Fi.
- Enjoy remote access and alerts from anywhere.
Using the Timer-to-Close Feature
- Accessed via the wall control panel.
- Set the door to close automatically after 1, 5, or 10 minutes of being open.
- Ideal for families who often forget to shut the garage.
Maintenance Tips for Long-Term Performance
- Lubricate moving parts such as hinges, rollers, and the belt every 6 months.
- Inspect safety sensors regularly to ensure they are aligned and clean.
- Test the backup battery quarterly—replace as needed.
- Check belt tension annually and adjust if it’s sagging or overly tight.
Common Issues and Troubleshooting
- Door won’t fully close: Check and adjust travel limits.
- Remote doesn’t work: Reprogram or check battery.
- No response to wall control: Check wiring and power.
- Safety sensor error: Re-align or replace faulty sensors.
Final Thoughts
Installing the Chamberlain WD962KEV Whisper Drive garage door opener is a project that brings both immediate satisfaction and long-term convenience. Its quiet performance, smart home compatibility, and backup power make it a top-tier choice for modern homeowners.
With patience, proper tools, and this detailed guide, you now know exactly how to install Chamberlain WD962KEV Whisper Drive garage door opener safely and successfully. Once it’s up and running, you’ll enjoy not only a smoother garage experience but also added security and smart control features for years to come.
Leave a Reply