Installing a garage door opener can seem like a daunting task, but with the right tools and guidance, it’s entirely manageable. The Chamberlain Whisper Drive Garage Door Opener is one of the quietest, most reliable options on the market today. Whether you’re replacing an old opener or installing a new one, knowing how to install a Chamberlain Whisper Drive garage door opener can help you get the job done safely and efficiently. In this guide, we’ll walk you through the entire process, offering helpful tips and insights to ensure a smooth installation.
What You’ll Need Before You Start
Before diving into the installation of a Chamberlain Whisper Drive garage door opener, it’s important to gather all the necessary tools and materials. Having everything on hand will save you time and prevent unnecessary frustration during the process. Here’s a list of items you’ll need:
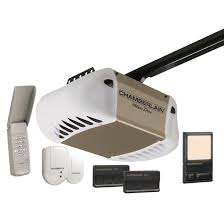
- Chamberlain Whisper Drive Garage Door Opener Kit (this should come with all essential components)
- Ladder (to reach the ceiling and mount the opener)
- Power Drill (with drill bits suitable for your garage ceiling material)
- Wrench Set (for tightening nuts and bolts)
- Screwdriver (flathead and Phillips)
- Measuring Tape (to ensure proper alignment)
- Level (to ensure the opener is mounted straight)
- Safety Glasses (to protect your eyes from flying debris)
- Pencil or Marker (to mark measurements)
Once you have everything ready, you’re good to go!
Read too: How Many Remotes Can A Chamberlain Garage Door Opener Have? Understaanding the Limits and Options
Step 1: Prepare Your Garage Door
Before installing the Chamberlain Whisper Drive garage door opener, it’s important to ensure that the garage door is in good working condition. A faulty or misaligned door can interfere with the installation and make the opener less effective. Here’s what you should do:
- Inspect the Tracks and Rollers: Ensure that the garage door tracks are clean, straight, and free of debris. Any misalignment could cause issues with the opener’s operation.
- Check the Door Springs: The tension in the door springs should be even. If one side is tighter than the other, it can cause problems when the opener is installed. If you’re unsure, consult a professional.
- Lubricate the Moving Parts: To ensure smooth operation, lubricate the rollers, hinges, and tracks with a garage door lubricant.
Step 2: Mount the Ceiling Bracket
The first step in how to install a Chamberlain Whisper Drive garage door opener is to attach the ceiling bracket. This bracket will hold the opener in place, so it’s essential that it is securely mounted.
- Measure the Distance: Use your measuring tape to find the exact center of your garage door. Mark this spot as it will be the reference point for the bracket placement.
- Install the Bracket: Use the power drill and screws provided in the kit to mount the ceiling bracket. Make sure it’s level and centered. It’s essential to secure the bracket properly to avoid future issues.
- Check Alignment: After installation, double-check that the bracket is perpendicular to the door’s track.
Step 3: Assemble the Drive Rail
The Chamberlain Whisper Drive uses a rail system to move the door. The rail must be correctly assembled and mounted to ensure smooth operation.
- Join the Rail Sections: The drive rail comes in several sections that need to be connected. Follow the instructions in the kit to align and snap the rail pieces together.
- Attach the Rail to the Ceiling Bracket: Once the rail is assembled, attach it to the ceiling bracket using the hardware provided. This may involve sliding the rail into the bracket or securing it with screws.
- Ensure the Rail is Level: Use a level to ensure the rail is perfectly horizontal. If the rail isn’t level, the opener will have trouble moving the door smoothly.
Step 4: Install the Motor Unit
Now that the rail system is in place, it’s time to install the motor unit, which is the heart of the Chamberlain Whisper Drive garage door opener.
- Lift the Motor: With the help of a second person, carefully lift the motor unit and place it on the assembled rail. The motor should be positioned so that the drive gear is properly aligned with the rail system.
- Secure the Motor: Using the provided bolts and hardware, secure the motor to the rail. Ensure that it is tightly fastened but avoid overtightening, which could cause damage.
- Check the Alignment: Make sure the motor unit is straight and properly aligned with the rail. If it’s off-center, it can affect the opener’s performance.
Step 5: Attach the Garage Door to the Opener
This is the step where your Chamberlain Whisper Drive garage door opener starts to come to life! Now, you’ll connect the opener to the actual garage door.
- Attach the Door Bracket: Find the bracket that attaches to the top of the garage door. This will allow the opener to pull the door open and push it closed. Secure the bracket to the door using the provided bolts and screws.
- Connect the Door Bracket to the Rail: Slide the bracket into the rail’s trolley system. This will allow the opener to pull the door when it moves.
- Adjust the Connection: Make sure the connection is secure but not too tight. You should be able to move the door slightly by hand to check that everything is aligned correctly.
Step 6: Wire the Opener
Now that the hardware is in place, it’s time to wire the Chamberlain Whisper Drive garage door opener.
- Connect the Power Supply: Plug the motor into a nearby electrical outlet. Make sure the circuit is grounded and the outlet can handle the opener’s power needs.
- Install the Wall Control: Mount the wall control unit at a convenient location inside the garage. This is where you’ll be able to open and close the door manually.
- Connect the Safety Sensors: The Chamberlain Whisper Drive comes with safety sensors that detect obstacles in the door’s path. Install these sensors on either side of the garage door and connect them to the opener. Ensure they are aligned to avoid operational issues.
Step 7: Test the System
Once the installation is complete, it’s time to test the system. Here’s how you can check everything:
- Run the Opener: Press the wall control to open and close the garage door. The door should move smoothly and quietly.
- Check the Safety Sensors: Block the sensors and test the door. It should reverse direction when the sensors are obstructed.
- Adjust the Limits: If the door doesn’t open or close all the way, use the limit settings to adjust the travel distance.
Step 8: Final Checks and Adjustments
The final step in how to install a Chamberlain Whisper Drive garage door opener is to make any necessary adjustments to ensure everything runs smoothly.
- Check the Opener’s Speed and Force: If the opener is moving too quickly or with too much force, adjust the settings accordingly.
- Lubricate the Moving Parts: Apply lubricant to the rail, chain, and moving parts to ensure smooth operation.
Conclusion
Congratulations! You’ve successfully installed your Chamberlain Whisper Drive garage door opener. With its quiet operation, reliable performance, and modern features, this opener will provide years of smooth, hassle-free operation. Remember to maintain your opener regularly by lubricating moving parts and checking for any signs of wear and tear. Enjoy the convenience and peace of mind that come with having a top-tier garage door opener in your home.
Leave a Reply