Installing a garage door opener can seem intimidating, especially if you’re a first-time DIYer. But if you’ve chosen a Chamberlain chain garage door opener, you’ve picked one of the most reliable, durable, and budget-friendly options available. Chamberlain’s chain-driven systems are designed for performance and long-lasting functionality, making them a favorite among homeowners.
In this guide, you’ll learn exactly how to install a Chamberlain chain garage door opener, step by step. Whether you’re replacing an old system or installing a new one from scratch, this guide walks you through everything—from tools needed to setup, programming, and safety testing.
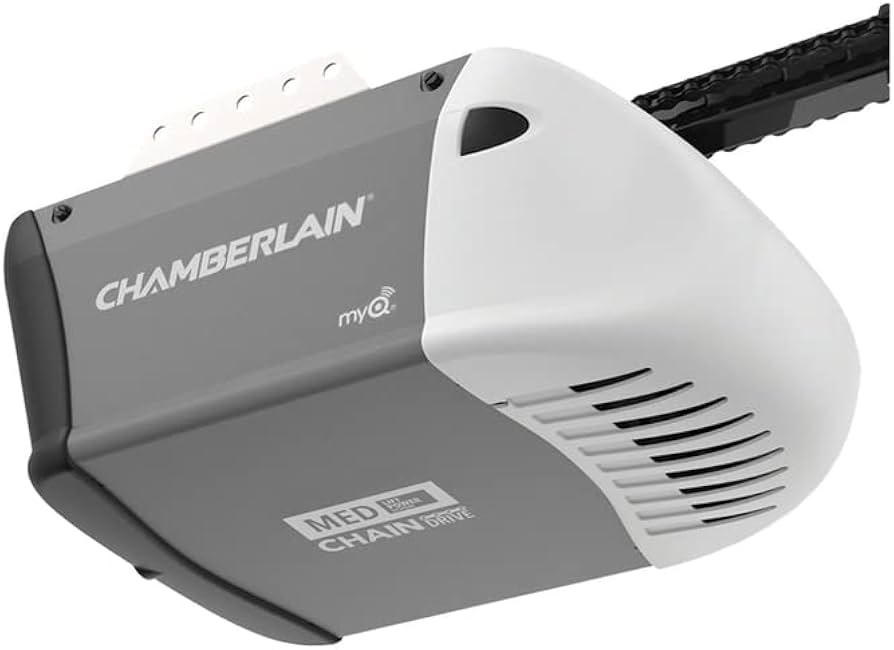
Why Choose a Chamberlain Chain Garage Door Opener?
Before diving into the installation process, it’s important to understand why many homeowners choose Chamberlain chain garage door openers:
- Durability: The chain drive mechanism is known for its rugged, heavy-duty build—great for extreme temperatures and frequent use.
- Powerful Motors: Chamberlain offers options like ½ HP and ¾ HP motors, ideal for both single and double garage doors.
- Affordability: Chain drive models are often less expensive than belt-driven openers.
- MyQ Compatibility: Many models support smart garage control via Wi-Fi (with or without additional accessories).
- Easy Replacement: Chain systems are compatible with standard garage doors and existing rails in many cases.
What You Need Before Installation
To install your Chamberlain chain garage door opener properly, you’ll need some tools and materials. Here’s a checklist to help you prepare.
Tools Required:
- Cordless drill with bits
- Socket and wrench set
- Flathead and Phillips screwdrivers
- Tape measure
- Adjustable wrench
- Level
- Stepladder
- Pliers
- Safety goggles
Items Usually Included in the Box:
- Motor unit
- Rail and chain assembly
- Trolley
- Header bracket
- Hanging brackets
- Safety sensors
- Door arm
- Remote control(s)
- Wall-mounted control panel
- Hardware bag (bolts, nuts, pins, fasteners)
Double-check the packaging against the manual to ensure nothing is missing before you begin.
Safety First: What to Check Before Installation
Before learning how to install a Chamberlain chain garage door opener, inspect the garage door for damage or imbalance. Try lifting it manually—if it’s hard to open, the springs or tracks may need repair first.
Also, make sure there’s an electrical outlet in the ceiling near where the opener will be mounted. If not, you’ll need a licensed electrician to install one safely.
How To Install A Chamberlain Chain Garage Door Opener — Step-by-Step Instructions
Installing a Chamberlain chain opener involves several steps, but each is manageable when broken down. Set aside 3–4 hours and follow these steps carefully.
Step 1: Assemble the Rail and Chain
- Lay the rail sections flat on the garage floor and connect them.
- Slide the trolley (which connects to the door) onto the rail.
- Attach the idler pulley to the front of the rail.
- Connect the rail to the motor unit using the mounting bracket.
- Loop the chain around the motor sprocket and idler pulley.
- Use the tensioner bolt to tighten the chain—leave ¼” slack in the middle.
Use a level to ensure the rail is straight before securing it.
Step 2: Mount the Header Bracket
- Locate the center of the garage door above the top panel.
- Mark a spot 2–6 inches above the highest point of door travel.
- Mount the header bracket into a wall stud using lag screws.
- Attach the front of the rail to the header bracket with a clevis pin.
This bracket stabilizes the opener and ensures smooth door movement.
Step 3: Hang the Motor Unit
- Position the motor unit toward the back of the garage ceiling.
- Use angle iron or slotted metal straps to suspend it from ceiling joists.
- Ensure the unit is level and aligned with the rail.
- Secure the mounting straps using lag screws into wood joists.
Avoid suspending the unit from drywall alone.
Step 4: Attach the Trolley to the Door Arm
- Manually close the garage door.
- Connect the curved door arm to the trolley.
- Connect the straight arm to the door bracket.
- Use the provided hardware to join both arms.
Move the trolley by hand to ensure it opens and closes the door without resistance.
Step 5: Install the Safety Sensors
- Mount sensors on either side of the garage door opening, 6 inches above ground.
- Use brackets and fasteners provided.
- Run sensor wires up the wall and along the ceiling toward the motor.
- Connect the wires to the sensor terminals on the motor unit.
Align sensors directly across from one another for reliable performance.
Step 6: Install the Wall Control Panel
- Choose a location near the interior garage door, at least 5 feet off the ground.
- Mount the panel using screws and anchors if necessary.
- Run control wires to the motor unit and attach them to the corresponding terminals.
Avoid running wires near sharp edges or metal objects that could cause interference.
Step 7: Power Up the Opener
- Plug the opener into the ceiling outlet.
- If your model includes MyQ smart technology, follow app instructions to connect.
- Use the control panel to operate the door and verify full open/close movement.
Step 8: Adjust the Travel and Force Settings
Each Chamberlain opener has adjustment dials or buttons on the motor unit:
- Set up/down travel limits so the door opens and closes completely.
- Adjust force settings to avoid excessive pressure during operation.
- Test door movement by opening and closing several times.
Listen for smooth operation without jerking or scraping.
Step 9: Test the Safety Reversal Features
- Place a solid object like a 2×4 under the door.
- Try to close the door—the opener should reverse when it hits the object.
- Break the sensor beam during closing—the door should reverse immediately.
These safety features are essential for protecting people and property.
Step 10: Program Remote Controls
- Press the “Learn” button on the opener unit.
- Press the desired button on the remote within 30 seconds.
- The light on the motor unit should flash to confirm pairing.
Repeat this step for additional remotes or keypads.
Troubleshooting Common Issues
| Problem | Possible Cause | Solution |
|---|---|---|
| Opener not responding | No power, loose wires | Check outlet and wire connections |
| Door doesn’t close fully | Travel limits not set correctly | Adjust up/down limits |
| Sensors not working | Misalignment or dirty lenses | Re-align and clean sensors |
| Chain too tight or loose | Improper tension | Adjust tensioner bolt |
| Remote not working | Dead battery or not programmed | Replace battery, reprogram remote |
Maintenance Tips for Long-Term Reliability
Once you’ve mastered how to install a Chamberlain chain garage door opener, it’s important to maintain it for optimal performance:
- Lubricate the chain and rollers every 6 months.
- Check sensor alignment monthly.
- Test safety features regularly.
- Inspect the chain tension and adjust if it sags or becomes too tight.
These simple habits will help extend the life of your opener and keep it running safely.
Conclusion
Learning how to install a Chamberlain chain garage door opener doesn’t have to be overwhelming. With the right tools, a little patience, and this detailed guide, you can confidently install your opener and enjoy years of reliable performance.
Chamberlain’s chain drive systems offer powerful operation and long-term durability, making them perfect for homeowners who value strength and efficiency over silence. Whether you’re a seasoned DIYer or just getting started, this project is a rewarding way to upgrade your home.
If you need a printable version of this guide or have additional questions, feel free to ask!
Leave a Reply