When it comes to upgrading your garage door opener system, installing a Chamberlain belt driven garage door opener is one of the best choices you can make. Known for its quiet operation, smooth performance, and durability, a belt-driven opener is an excellent solution for many homeowners.
However, installing a new garage door opener might seem like a daunting task. Fear not! With a little patience, some basic tools, and following the proper steps, you can install your Chamberlain belt driven garage door opener on your own. This detailed guide will walk you through the process step-by-step, making sure you’re well-equipped for the job.
Read too: How Many Remotes Can A Chamberlain Garage Door Opener Have? Understaanding the Limits and Options
Why Choose a Chamberlain Belt Driven Garage Door Opener?
Before diving into the installation process, let’s take a quick look at why you might want to choose a Chamberlain belt-driven garage door opener:
- Quiet Operation: Unlike chain-driven openers that can be noisy, belt-driven openers use a rubber belt, making them much quieter, which is perfect for garages attached to the house or in areas where noise is a concern.
- Smooth Performance: The smooth and consistent operation of a belt-driven opener makes it ideal for those who want minimal disruption in their daily routine.
- Durability: Chamberlain openers are known for their reliability and longevity. The belt system is designed for low-maintenance and will last for years.
- Advanced Features: Many Chamberlain models come equipped with advanced technology such as Wi-Fi connectivity, mobile app control, and more, making it easier to control your garage door from anywhere.
Now, let’s get started with the installation process.
How To Install A Chamberlain Belt Driven Garage Door Opener: Step-By-Step Instructions
1: Gather the Necessary Tools and Materials
Before you begin, make sure you have the right tools and materials on hand. Here’s what you’ll need:
- Chamberlain belt-driven garage door opener kit (includes motor unit, rail assembly, belt, and mounting hardware)
- Ladder (for reaching the ceiling and installing the opener)
- Measuring tape (to measure distances and ensure proper alignment)
- Screwdriver or drill (for mounting the motor and other components)
- Wrench set (for tightening bolts and screws)
- Pencil (for marking positions)
- Level (to ensure everything is installed correctly)
- Safety gear (such as gloves and goggles for protection)
2: Prepare Your Garage
Before beginning the installation, make sure your garage is ready. Remove any obstacles, debris, or items that may interfere with the installation process. Clear space around the garage door area so you can work freely.
- Check the door balance: Ensure your garage door is properly balanced and functioning. If the door is misaligned or off-track, the installation may not go smoothly.
- Ensure the ceiling is structurally sound: The motor unit will be mounted to the ceiling, so it is important to make sure that the ceiling joists are in good condition.
3: Install the Mounting Bracket
- Mark the Mounting Points: Using a pencil, mark the position where you’ll be mounting the motor bracket on the ceiling. Measure the width and height to ensure the opener will be centered.
- Install the Mounting Bracket: Use a drill to install the mounting bracket onto the ceiling. Make sure to tighten the screws securely so the bracket stays in place.
Step 4: Assemble the Rail and Motor Unit
- Assemble the Rail: Start by assembling the rail for the belt-driven system. The rail is typically broken down into several parts, which should be connected according to the instructions provided in the Chamberlain kit. Use a screwdriver or drill to secure the parts together.
- Attach the Motor to the Rail: Once the rail is assembled, you will need to attach the motor to the rail. The motor unit should slide into the designated position on the rail. Follow the instructions carefully to ensure it is aligned properly.
- Secure the Motor: Using screws or bolts, secure the motor unit to the rail. Be sure to tighten everything properly to prevent any loosening during operation.
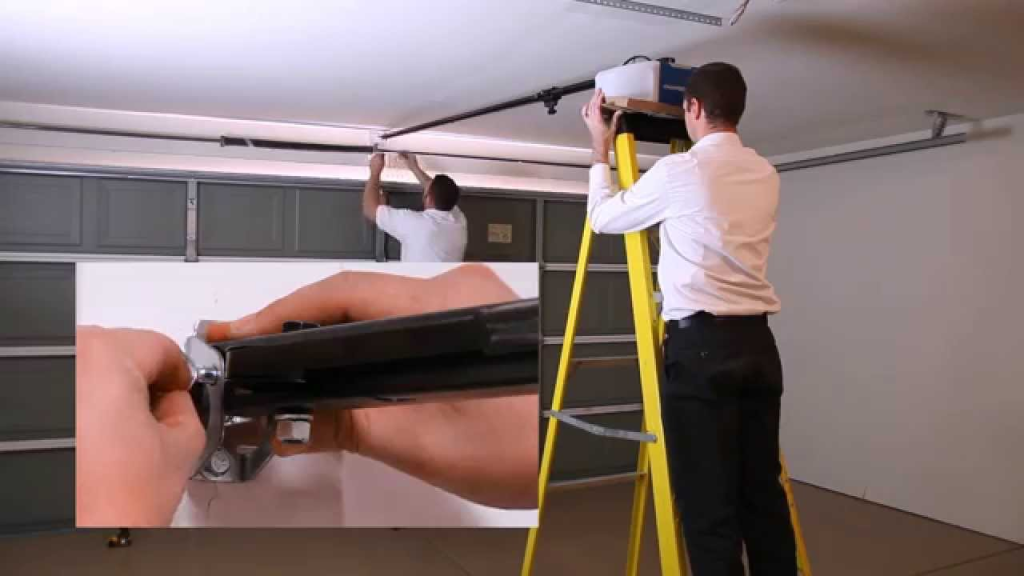
5: Mount the Rail and Motor to the Ceiling
- Lift the Rail and Motor into Position: With the help of a friend or using a sturdy ladder, carefully lift the rail and motor assembly into place on the ceiling bracket.
- Secure the Assembly: Once the assembly is in position, use the wrench or screwdriver to secure the motor and rail system to the ceiling bracket. Ensure that the unit is level and aligned properly for smooth operation.
- Check for Stability: Once the motor is mounted, give the assembly a gentle shake to ensure it is properly secured. It should not move or wobble.
6: Install the Belt
- Attach the Belt to the Rail: The next step is to install the belt that drives the garage door. Begin by attaching one end of the belt to the motor unit. Follow the provided instructions for your specific model to ensure the belt is attached correctly.
- Run the Belt Along the Rail: As you move along the rail, thread the belt through the system, making sure it is properly aligned and fits into the pulleys.
- Tighten the Belt: Once the belt is in place, adjust the tension so that the belt is snug but not overly tight. This will help the system run smoothly.
- Attach the Belt to the Door: Lastly, attach the end of the belt to the garage door’s trolley. Follow the instructions for securing the belt to the door. The trolley should move smoothly along the rail when the door is operated.
7: Wiring the Garage Door Opener
- Connect the Wiring: After the mechanical components are in place, it’s time to wire the opener. Follow the instructions for connecting the motor to the power supply, making sure the wires are securely attached.
- Install the Wall Control: Mount the wall control unit near the door and connect the wiring from the motor to the control panel. This will allow you to operate the opener manually if needed.
- Connect to Power: Plug the opener into a nearby electrical outlet. Be sure to check that the voltage is appropriate for the model.
8: Testing the System
- Test the Door Operation: Once everything is installed and wired, it’s time to test the garage door opener. Press the wall control button or use the remote to open and close the door. Make sure it operates smoothly and quietly.
- Check for Obstructions: Ensure that there are no obstructions in the path of the door and that the opener functions without hesitation.
- Adjust the Limits: Most Chamberlain belt-driven openers have limit settings that control how far the door opens and closes. You may need to adjust the limit switches to ensure the door opens fully and closes tightly.
9: Final Adjustments and Calibration
- Check the Door Balance: It’s crucial to check that the garage door is balanced correctly. If the door doesn’t open or close evenly, adjust the tension on the belt or consult the manual for further instructions.
- Program the Remotes: Most Chamberlain openers come with remote controls. Follow the instructions to program the remotes, allowing you to open and close the door with ease.
- Test Safety Features: Be sure to test the safety reversal system, which is a built-in feature that stops and reverses the door if it detects an obstruction. This is an important safety measure.
Conclusion
Installing a Chamberlain belt-driven garage door opener can seem like a complex task, but with the right tools, a bit of patience, and following the steps outlined above, you can complete the installation process successfully. The quiet and smooth operation of a belt-driven system will provide you with years of reliable service, enhancing the convenience and security of your garage.
By following this guide, you’ll be able to install your garage door opener with confidence, ensuring it works perfectly and provides the level of performance you expect from Chamberlain.
Leave a Reply