In today’s tech-driven world, connecting your Chamberlain garage door opener to wifi can significantly improve the convenience and functionality of your garage door system. Whether you’re looking to control your garage door remotely, monitor its status, or integrate it with smart home systems, understanding how to connect a Chamberlain garage door opener to wifi is a valuable skill. With just a few simple steps, you can link your garage door opener to your home network and start enjoying all the benefits of smart home technology.
This comprehensive guide will walk you through everything you need to know about connecting your Chamberlain garage door opener to wifi, including troubleshooting tips and things to keep in mind during the setup process.
Why Should You Connect Your Chamberlain Garage Door Opener To Wifi?
Before diving into the steps of how to connect a Chamberlain garage door opener to wifi, it’s helpful to understand the benefits of doing so.
- Remote Control Access: With wifi connectivity, you can control your garage door from anywhere using your smartphone or smart device, making it easy to open and close the door without being physically present.
- Increased Security: Some models allow you to receive alerts and notifications on your phone whenever your garage door opens or closes, adding an extra layer of security to your home.
- Voice Control Integration: By connecting your Chamberlain opener to wifi, you can integrate it with voice-activated systems such as Amazon Alexa or Google Assistant, giving you hands-free control of your garage door.
- Convenience: You’ll never have to worry about forgetting to close your garage door again. You can monitor and control it remotely, ensuring your garage is secure.
Prerequisites for Connecting Your Chamberlain Garage Door Opener to Wifi
Before you begin the process of connecting your Chamberlain garage door opener to wifi, there are a few things you’ll need to have in place:
- A Chamberlain Smart Garage Door Opener: Most modern Chamberlain garage door openers come with built-in wifi capabilities or can be upgraded with a wifi-enabled accessory. Check that your opener supports wifi connectivity.
- A Stable Wifi Network: Ensure that your home wifi network is stable and operating correctly. The garage door opener needs a strong signal to connect to the internet reliably.
- Chamberlain MyQ Account: Chamberlain’s MyQ app is used to control your garage door opener remotely. You’ll need to create a MyQ account if you don’t already have one.
- Smartphone or Tablet: To use the MyQ app for setup, you’ll need a compatible smartphone or tablet.
- A Wifi-Compatible Router: Make sure your router is compatible with the wifi standard used by your garage door opener. Most modern routers work well with Chamberlain devices, but it’s always a good idea to double-check.
Once you’ve gathered these prerequisites, you’re ready to begin!
How To Connect A Chamberlain Garage Door Opener To Wifi: Step-by-Step Guide
Step 1: Download the MyQ App
The first step in connecting your Chamberlain garage door opener to wifi is to download the MyQ app to your smartphone or tablet.
- For iOS: Go to the App Store and search for the Chamberlain MyQ app. Download and install it.
- For Android: Visit the Google Play Store, search for the Chamberlain MyQ app, and install it on your device.
Once installed, launch the app and follow the on-screen instructions to create an account or log in if you already have one.
Step 2: Power Up Your Garage Door Opener
Next, ensure that your Chamberlain garage door opener is powered on and in a state where it can be connected to wifi.
- Check that the opener is plugged in and receiving power.
- Some models have a blinking LED light to indicate that they are ready for setup. If you don’t see this, check the user manual for instructions on how to initiate the setup mode for your specific model.
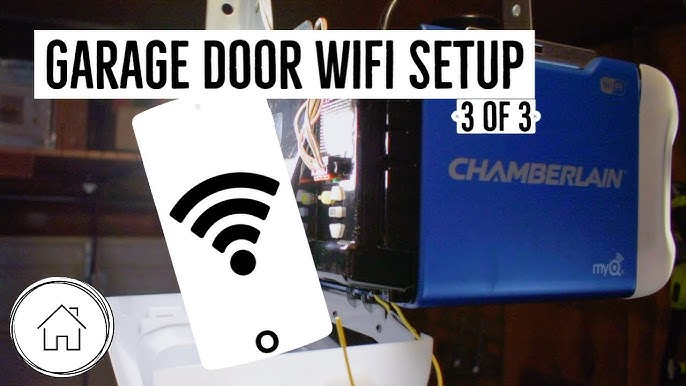
Step 3: Press the Wifi Button on the Garage Door Opener
To connect the garage door opener to your wifi network, you will need to activate the setup mode. This is typically done by pressing the Wifi button on the opener itself.
- Find the Wifi button on your Chamberlain opener. It’s usually located on the front panel of the motor unit, near the antenna.
- Press and hold the button until the LED light on the opener starts blinking, signaling that it is in setup mode and ready to connect to your wifi network.
Step 4: Connect the Opener to Your Wifi Network
Now, it’s time to link the Chamberlain garage door opener to your home wifi network.
- Open the MyQ App on your phone or tablet and sign in to your account.
- Select the “Add a Device” option within the app and choose the Chamberlain garage door opener from the list of available devices.
- Follow the prompts to enter your wifi network name (SSID) and password. Be sure to use the correct credentials for your network.
- The app will attempt to connect the opener to your wifi network. This may take a few minutes, so be patient.
Step 5: Complete the Setup Process
Once the Chamberlain garage door opener is successfully connected to your wifi network, the MyQ app will notify you that the setup is complete.
- You should now be able to control the garage door opener from your MyQ app, regardless of your location.
- Test the connection by opening and closing the door remotely using the app. If the door responds, the setup is complete!
Troubleshoot Common Issues
Sometimes, things don’t go as smoothly as expected. If you encounter issues while trying to connect a Chamberlain garage door opener to wifi, here are some common troubleshooting steps to help you out:
- Ensure a Strong Wifi Signal: If your opener is too far from the router, the wifi signal may not be strong enough. Try moving the opener closer to the router or using a wifi extender.
- Double-Check Network Settings: Make sure your wifi network is working correctly, and you’re entering the correct wifi password. The opener will not connect if the password is incorrect.
- Restart Your Devices: Sometimes, simply restarting the Chamberlain garage door opener, your phone, and your router can resolve connection issues.
- Reset the Garage Door Opener: If you’re still having trouble, you may need to reset the opener and start the process over. Refer to the user manual for specific instructions on how to reset your Chamberlain garage door opener.
Final Thoughts
Connecting your Chamberlain garage door opener to wifi opens up a world of convenience and security. By following these simple steps, you’ll be able to control your garage door remotely, monitor its status, and even integrate it with other smart home devices. The MyQ app makes the entire process incredibly easy and efficient, and with just a few taps, you can enjoy the benefits of smart home technology.
Keep in mind that a strong and stable wifi connection is key to ensuring your opener works smoothly. If you encounter any difficulties, don’t hesitate to consult the user manual or reach out to Chamberlain support for further assistance.
By connecting your garage door opener to wifi, you’re not just improving the way you interact with your garage — you’re making your home smarter, safer, and more convenient.
Leave a Reply