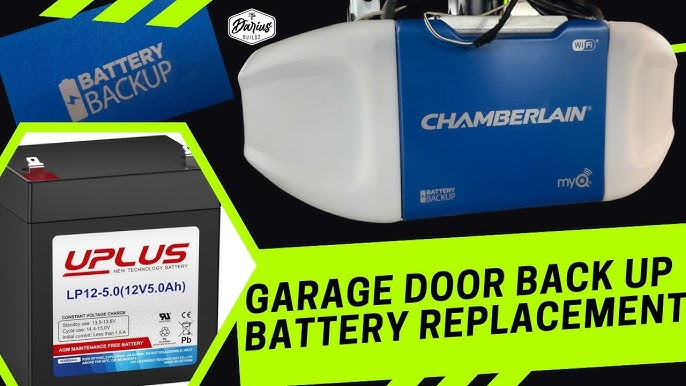
How To Change Backup Battery In Chamberlain Garage Door Opener? The Chamberlain Garage Door Opener is a reliable and efficient device that helps homeowners open and close their garage doors with ease. One of its key features is the backup battery, which ensures that your garage door opener continues to work even during power outages. However, just like any battery-powered device, the backup battery will eventually need to be replaced. If you’ve noticed that your garage door opener isn’t functioning as it should or the battery indicator light is flashing, it might be time to change the backup battery.
In this comprehensive guide, we will walk you through the steps on how to change the backup battery in Chamberlain garage door opener, discuss why it’s essential to perform this maintenance, and offer tips for keeping your opener in top condition.
Why Is the Backup Battery Important for Chamberlain Garage Door Openers?
Before we dive into the steps for changing the backup battery in your Chamberlain garage door opener, it’s essential to understand its purpose and importance. The backup battery serves a critical role in ensuring the functionality of your garage door opener during power interruptions.
Here’s why the backup battery is vital:
- Power Outages: If there’s a power outage, the backup battery provides the energy needed for your opener to function, allowing you to open or close the garage door without needing electricity.
- Emergency Operation: In case of emergencies, such as a power failure, your garage door opener’s backup battery ensures you won’t be locked out of or trapped in your garage.
- Convenience: The backup battery provides peace of mind, knowing that your garage door can operate even when the power goes out.
Regularly changing the backup battery ensures that your Chamberlain garage door opener can keep operating reliably, whether you’re dealing with a power outage or just need backup in case of emergencies.
How To Change Backup Battery In Chamberlain Garage Door Opener: Step-By-Step Guide
Changing the backup battery in your Chamberlain garage door opener is a straightforward process. Follow these easy steps to get your opener back in action.
Step 1: Identify the Backup Battery Location
The backup battery is usually located within the motor unit of your Chamberlain garage door opener. To begin, make sure the opener is powered off by unplugging it from the electrical outlet or switching off the circuit breaker that controls the garage door opener.
- On most Chamberlain models, you can find the backup battery by looking for a compartment on the front or side of the motor unit.
- Check the owner’s manual for your specific model to ensure you’re looking in the right spot.
Step 2: Remove the Old Backup Battery
Once you’ve located the backup battery compartment, you’ll need to remove the old battery.
- Open the compartment door by releasing the latch or screws (if applicable).
- Gently disconnect the old backup battery from the wiring. Most models use a plug-and-play battery connection, so this step should be quick and simple.
- Remove the battery from the compartment. Be careful not to damage any wires or other components inside the unit while removing the old battery.
Step 3: Install the New Backup Battery
Now that the old battery is removed, it’s time to install the new one. When choosing a replacement battery, be sure to purchase a compatible battery that matches the specifications outlined in the owner’s manual.
- Insert the new battery into the compartment, ensuring it is positioned correctly.
- Reconnect the battery to the wiring harness. Again, this should be an easy plug-and-play connection.
- Close the compartment by securing the door or fastening the screws.
Step 4: Test the Garage Door Opener
Once the new backup battery is installed, it’s essential to test the Chamberlain garage door opener to ensure it is functioning correctly. Plug the opener back into the electrical outlet or turn on the circuit breaker, and follow these steps:
- Check the battery indicator light: The indicator should turn solid green, signifying that the new backup battery is installed correctly and is fully charged.
- Test the door: Open and close the garage door a few times to verify that the opener is operating properly.
- Simulate a power outage: To further test the battery’s functionality, unplug the opener from the power source while the door is in motion. The opener should continue to work using the backup battery.
If everything works correctly, you’ve successfully changed the backup battery in your Chamberlain garage door opener!
Maintenance Tips
Changing the backup battery is an important part of garage door opener maintenance, but there are other tasks you should regularly perform to ensure the longevity and efficiency of your opener.
1. Lubricate the Moving Parts
Regular lubrication of the opener’s chain, belt, rollers, and other moving parts reduces friction and extends the life of the system. Use a silicone-based lubricant for optimal results.
2. Inspect the Garage Door Tracks and Springs
Periodically inspect the garage door tracks for obstructions or signs of damage. Also, check the springs to make sure they are not worn or broken, as faulty springs can cause the door to malfunction or become imbalanced.
3. Test the Safety Sensors
Make sure the photo-eye sensors are aligned and free of dirt or debris. Misaligned or dirty sensors can prevent the door from closing properly, creating a safety hazard.
4. Check the Opener’s Force and Travel Settings
Periodically test the force settings and travel limits to ensure the door opens and closes smoothly. If necessary, adjust these settings according to the instructions in the user manual.
5. Regularly Test the Backup Battery
Even though you’ve just changed the backup battery, it’s a good idea to test it periodically, especially if you live in an area prone to power outages. This will give you peace of mind knowing that your opener is ready for emergencies.
Troubleshooting Issues
If the new backup battery isn’t charging, or if the battery indicator continues to blink, there may be a deeper issue at play. Here are some troubleshooting steps to consider:
1. Ensure the Battery Is Properly Connected
Double-check the battery connections. If the wires are loose or the battery isn’t properly seated, it may not charge correctly.
2. Verify the Battery Type
Ensure the replacement battery is the correct model for your Chamberlain garage door opener. Using the wrong battery type could prevent it from charging or working properly.
3. Reset the Opener
Sometimes, resetting the opener can solve electrical issues. Refer to your user manual for instructions on how to reset the opener.
4. Contact Customer Support
If the issue persists, it may be time to contact Chamberlain customer support or a professional technician for further assistance.
Conclusion: Keep Your Chamberlain Garage Door Opener Running Smoothly
Changing the backup battery in your Chamberlain garage door opener is an essential task to ensure the device remains reliable and functional. By following the steps outlined in this guide, you can easily replace the backup battery and continue enjoying the convenience and peace of mind that your opener provides.
Remember that regular maintenance, such as lubricating the moving parts and inspecting the safety sensors, will help your garage door opener function at its best. If you ever encounter issues, don’t hesitate to troubleshoot or seek professional help to keep everything running smoothly.
Leave a Reply