Garage door openers are incredibly useful devices, not just for opening and closing your garage door automatically but also for improving your overall convenience and security. One feature that many users may not be fully aware of is the light timer setting on their Chamberlain garage door opener. Understanding how to adjust the light timer on Chamberlain garage door openers can significantly enhance your user experience. It ensures that your garage is well-lit when you need it and conserves energy by turning off the lights when you no longer require them.
If you’ve ever found yourself wondering how to adjust the light timer on your Chamberlain garage door opener, you’re in the right place. This guide will walk you through the process, explaining each step in detail. Whether you want to set a timer for how long the lights stay on or simply adjust the settings for your convenience, we’ve got you covered.
Read too: How Many Remotes Can A Chamberlain Garage Door Opener Have? Understaanding the Limits and Options
Why Adjusting the Light Timer on Your Chamberlain Garage Door Opener is Important
Before diving into the technical aspects of how to adjust the light timer on Chamberlain garage door openers, let’s briefly touch on why it’s beneficial. Adjusting your light timer allows you to:
- Save Energy: By controlling how long the lights stay on after the garage door opens, you can prevent unnecessary energy waste. If the lights stay on too long, it can increase your energy bills.
- Increase Convenience: You don’t have to worry about manually turning the lights off each time you open the garage. Setting a timer ensures the lights automatically turn off after a preset time.
- Enhance Security: Having your garage well-lit when you arrive home during the night improves visibility and safety. Plus, automatically turning off the lights reduces the risk of someone noticing that your garage is still illuminated when it shouldn’t be.
Now that you understand why it’s essential to adjust the light timer, let’s move on to the steps for doing so.
How To Adjust Light Timer On Chamberlain Garage Door Opener: A Step-by-Step Guide
Adjusting the light timer on your Chamberlain garage door opener is a simple process, and it can be done in a few easy steps. Whether you’re a seasoned DIYer or someone who just wants to know how to adjust light settings, this guide will ensure you’re in control.
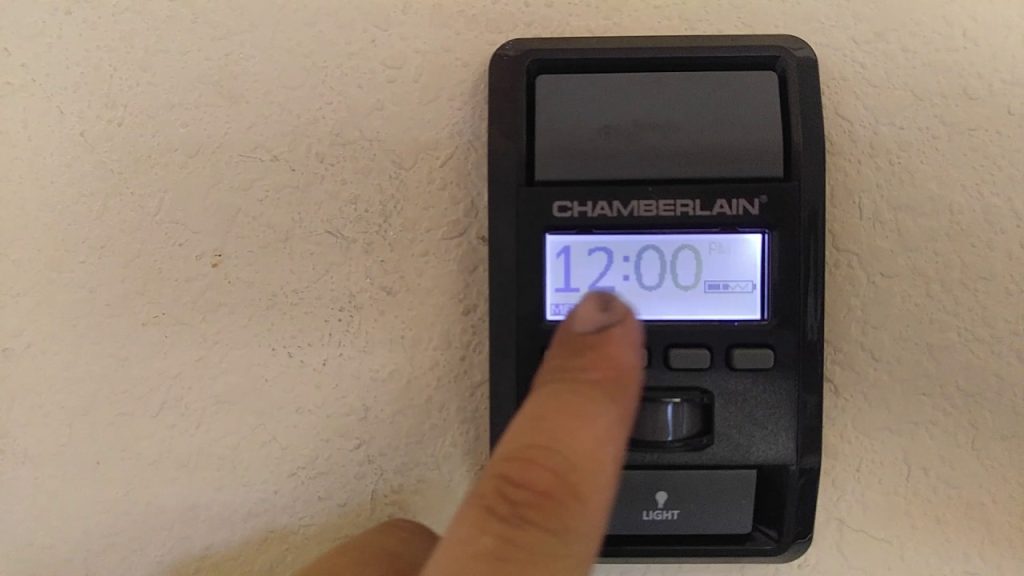
Step 1: Locate Your Chamberlain Garage Door Opener’s Control Panel
Before making any adjustments, you need to locate the control panel on your Chamberlain garage door opener. The control panel is usually located on the ceiling near the garage door and is where the primary settings for your garage door opener are located.
Step 2: Find the “Light Timer” Settings
Once you have located the control panel, look for the section where the light timer settings are housed. This could vary depending on the model of your Chamberlain opener, but typically, the light settings will either be located under the “Light” button or in a submenu accessed through a series of button presses.
If your model has a digital screen, it might display a menu where you can select different settings, including the light timer. If you’re unsure where to find these settings, refer to your owner’s manual for detailed instructions on how to navigate the control panel.
Step 3: Adjust the Light Timer Setting
After finding the appropriate section for the light timer, you can proceed to adjust the settings. Typically, Chamberlain garage door openers allow you to set the light timer for anywhere between 1 minute and 4 minutes.
To adjust the light timer:
- Press the “Light” or “Settings” button (depending on your model) to access the light timer menu.
- Use the “+” or “-” buttons (or a similar control mechanism) to increase or decrease the amount of time the light stays on after the door is opened.
- Select your desired timer setting, and confirm the adjustment.
Step 4: Save Your Settings
Once you’ve selected the desired time, be sure to save your settings by pressing the “Enter” button or following the instructions provided on the display. This ensures that the new light timer setting is activated and will be applied the next time the door is opened.
Step 5: Test the New Settings
Now that you’ve adjusted the light timer, it’s time to test the new settings. Open and close your garage door to make sure the light stays on for the desired amount of time. If it doesn’t match your preference, simply repeat the steps and adjust the timer accordingly.
Troubleshooting Common Issues With Light Timers
While adjusting the light timer on your Chamberlain garage door opener is generally a smooth process, some users may encounter issues along the way. Below are a few common problems and solutions:
1. The Light Doesn’t Stay On Long Enough
If the light turns off too quickly, make sure that you’ve set the timer to a longer duration. If it’s already set to the maximum duration and still turns off too soon, there could be a malfunction with the sensor or timer mechanism. In this case, it’s best to consult the Chamberlain support team or refer to the manual for further troubleshooting.
2. The Light Doesn’t Turn On at All
If the light doesn’t turn on when you open the garage door, ensure that the light bulb is not burnt out and that it is properly installed. If the bulb is fine, there may be an issue with the light sensor or control panel. Try resetting your garage door opener to see if that fixes the problem.
3. The Timer Setting Won’t Save
If the timer setting won’t save, try resetting the garage door opener by unplugging it for 30 seconds and plugging it back in. This will reset the system, and you can try adjusting the timer again. If the issue persists, it could indicate a more serious technical problem that requires professional repair.
Additional Tips for Using Your Chamberlain Garage Door Opener Efficiently
- Regular Maintenance: To ensure your Chamberlain garage door opener continues to function smoothly, regularly check and clean the control panel, sensors, and light bulbs.
- Upgrading Your System: If your garage door opener is outdated, consider upgrading to a model with enhanced features, including better light settings, energy-saving options, and Wi-Fi compatibility.
- Consult the Manual: Always refer to the user manual for your specific model if you encounter difficulties. It contains valuable information about adjusting timers and other settings.
Conclusion
Knowing how to adjust the light timer on your Chamberlain garage door opener can save you time, energy, and improve your overall garage experience. By following the steps outlined above, you can ensure that your garage is well-lit when you need it and that the lights automatically turn off when you’re done, preventing unnecessary energy consumption. Remember to test your settings after making adjustments to ensure everything is functioning as expected. With just a few simple steps, you can take full control of the lighting in your garage!
Leave a Reply