Chamberlain garage door openers are known for their reliability and smooth operation. However, over time, the settings on your garage door opener may require some adjustments. One of the most common adjustments that homeowners need to make is how to adjust the garage door opener’s up and down limits. Properly adjusting these limits ensures your door opens and closes without issues, preventing damage to the door and opener system.
In this guide, we will explain how to adjust the Chamberlain garage door opener up and down and the importance of this maintenance task. Whether you’re dealing with a door that doesn’t open fully or a door that doesn’t close completely, this article will provide all the information you need to adjust it yourself.
Why Do You Need to Adjust the Up and Down Limits?
Before we dive into the process, it’s important to understand why adjusting the up and down limits of your garage door opener is necessary. The up and down limits control how far the garage door opens and closes, ensuring it operates smoothly and safely.
Here are the key reasons why this adjustment is important:
- Proper Door Operation: If the limits are set incorrectly, the door may not open or close fully. This could lead to the door stopping before it reaches the top or bottom, or it could close too tightly, causing strain on the door and opener.
- Safety: An improperly adjusted door might not engage safety sensors correctly, which can cause the door to reverse unexpectedly or fail to reverse when there’s an obstruction.
- Prevent Damage: A door that doesn’t open or close properly can cause unnecessary wear on the opener and other components, leading to costly repairs.
Now that you understand the importance of adjusting the up and down limits, let’s look at how you can make these adjustments on your Chamberlain garage door opener.
How To Adjust Chamberlain Garage Door Opener Up And Down: Step-by-Step Guide
Adjusting the up and down limits on your Chamberlain garage door opener is a simple process that you can do yourself with a few tools. Follow these steps to make sure your garage door opens and closes correctly.
Step 1: Disconnect the Power
The first thing you should do before making any adjustments to your garage door opener is to disconnect the power. This is important for safety reasons, as you don’t want the motor to engage while you’re working on the door. Unplug the opener or disconnect it from the electrical outlet.
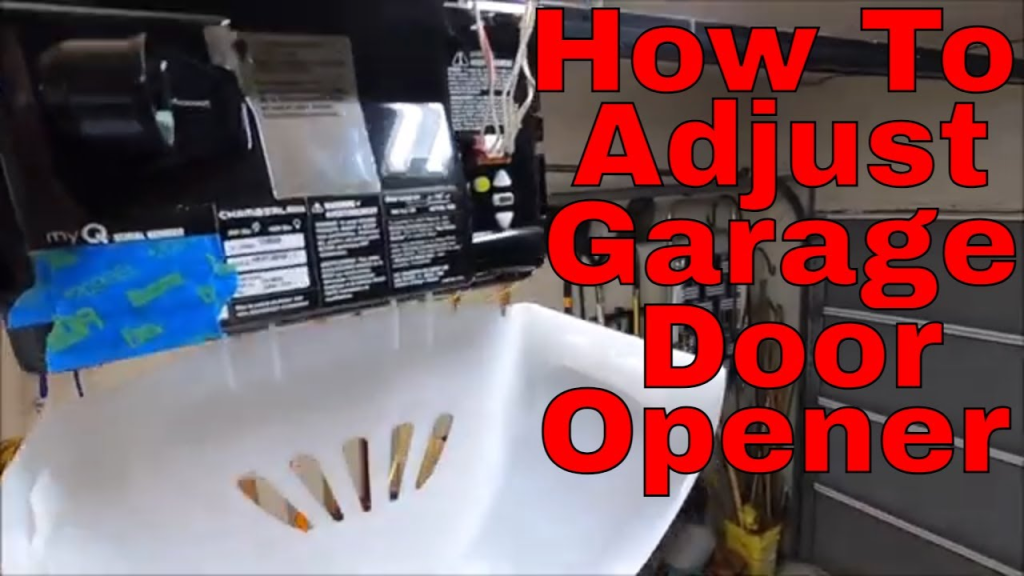
Step 2: Locate the Limit Adjustment Screws
Your Chamberlain garage door opener will have two limit adjustment screws: one for the up limit (to set how high the door opens) and one for the down limit (to set how low the door closes). These screws are usually located on the back or side of the opener unit.
- Up limit screw: This controls the distance the door travels when opening.
- Down limit screw: This controls how far the door moves when closing.
These screws are typically labeled “Up” and “Down,” making it easier to identify which is which.
Step 3: Adjust the Up Limit
To adjust the up limit, you’ll need to modify the screw that controls how high the door opens. Use a flathead screwdriver or the appropriate tool to turn the screw in the following directions:
- To raise the door: Turn the screw clockwise. This will allow the door to open higher, increasing the maximum open position.
- To lower the door: Turn the screw counterclockwise. This will decrease the maximum height the door opens to, bringing it down.
When adjusting the up limit, be careful not to raise the door too high, as this can cause the door to get stuck in an open position or fail to close completely.
Step 4: Adjust the Down Limit
Next, adjust the down limit, which determines how far the door closes. Use your screwdriver or tool to turn the screw controlling the down limit:
- To lower the door: Turn the screw counterclockwise. This will cause the door to close further.
- To raise the door: Turn the screw clockwise. This will stop the door from closing too tightly.
The goal is to make sure the door closes completely without overexerting force, which could strain the motor or cause the door to misalign.
Step 5: Test the Garage Door
Once you’ve adjusted both the up and down limits, it’s time to test the door. Reconnect the power to the opener and press the open/close button to see how the door operates.
- Check the opening: The door should open fully to the set limit without getting stuck or stopping prematurely.
- Check the closing: The door should close completely without going past the bottom threshold or getting stuck.
If the door operates as expected, you’re done! However, if the door is still not operating correctly, you may need to make small adjustments to the screws until it functions properly.
Step 6: Make Fine Adjustments if Necessary
Sometimes, the initial adjustments may not be perfect. If the door doesn’t open or close precisely as needed, you can make fine-tuned adjustments:
- Make very small turns of the adjustment screws, either clockwise or counterclockwise, to tweak the settings.
- Repeat the testing process until the door operates smoothly and reaches the desired open and close positions.
Troubleshooting Common Problems
If you’ve followed the steps above and the door still isn’t functioning correctly, here are some common issues to look out for:
1. Door Stops Before Reaching Full Open Position
- Cause: The up limit is set too low.
- Solution: Increase the up limit by turning the screw clockwise.
2. Door Doesn’t Close Completely
- Cause: The down limit is set too high.
- Solution: Lower the down limit by turning the screw counterclockwise.
3. Door Is Too Loose or Sluggish
- Cause: The drive mechanism might need lubrication, or the chain/belt may be loose.
- Solution: Lubricate the chain or belt, and inspect the drive components for tightness or wear.
4. Garage Door Reverses Mid-Cycle
- Cause: The sensors may be misaligned or obstructed, or the door’s down limit might be set too high.
- Solution: Align the sensors and adjust the down limit screw.
Additional Tips for Maintaining Your Chamberlain Garage Door Opener
Maintaining your Chamberlain garage door opener is essential for keeping it functioning correctly. Here are a few extra tips for ensuring your garage door operates smoothly:
- Regularly Lubricate Moving Parts: Lubricate the chain, belt, and other moving parts to reduce wear and noise.
- Inspect the Door Tracks: Check for any debris or obstructions that might prevent the door from opening and closing smoothly.
- Check the Safety Sensors: Ensure that the safety sensors are aligned and functioning properly to prevent accidents.
- Tighten Loose Bolts: Over time, bolts may become loose, leading to misalignments. Tighten any loose hardware to keep the door functioning optimally.
Conclusion
Knowing how to adjust your Chamberlain garage door opener up and down is a valuable skill for any homeowner. By properly adjusting the up and down limits, you can ensure that your garage door operates smoothly, efficiently, and safely. Regular maintenance, including checking these limits, will help extend the life of your opener and ensure it continues to work properly.
With this easy-to-follow guide, you can perform the necessary adjustments with confidence and keep your garage door opener working at its best for years to come.
Leave a Reply