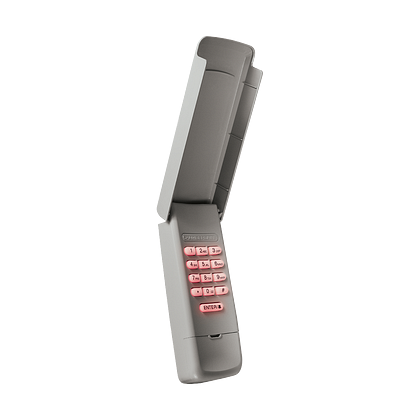
A Chamberlain garage door opener keypad is a highly convenient way to access your garage without needing a traditional remote or key. It offers keyless entry, making it easier and safer to access your home. However, to use this feature, you must program the keypad correctly. If you’re wondering, “How do you program a Chamberlain garage door opener keypad?” you’ve come to the right place.
In this article, we will walk you through the entire process of programming your Chamberlain garage door opener keypad. We will cover everything from setting up a new keypad to troubleshooting common issues. By the end of this guide, you’ll have a better understanding of how to get your keypad working and unlock the full benefits of your Chamberlain garage door opener.
Why Use a Chamberlain Garage Door Opener Keypad?
Before diving into the programming steps, let’s explore why many homeowners choose to use a Chamberlain garage door opener keypad in the first place.
- Convenience: With a keypad, you can access your garage without needing a key or remote. This is especially useful if you have multiple people accessing the garage, like family members or service providers.
- Security: Keyless entry reduces the risk of someone stealing your remote or copying your key. The keypad uses a PIN code, so only those with the correct code can open the door.
- Flexibility: You can easily change the PIN code whenever needed, giving you full control over who has access to your garage.
- No Batteries for Keypads: Unlike traditional remotes, keypads do not require batteries (though there are some with backup batteries). This ensures that they remain functional and reliable in the long run.
Now that you understand the importance of a keypad, let’s move on to the programming process.
How Do You Program A Chamberlain Garage Door Opener Keypad?
Programming your Chamberlain garage door opener keypad is a relatively simple process that you can do on your own. Follow these step-by-step instructions to successfully program your keypad and start using it right away.
Step 1: Prepare Your Garage Door Opener
Before programming the keypad, make sure your Chamberlain garage door opener is in a state where it can be programmed.
- Turn the Power On: Ensure that your Chamberlain garage door opener is plugged in and has power.
- Locate the Learn Button: The “learn” button is an important part of the programming process. It can usually be found on the motor unit of the garage door opener. The button may be colored red, orange, yellow, or green, depending on the model of your opener.
- For older models, the button might be located on the back of the unit.
- For newer models, the learn button is often located on the side of the unit or near the antenna wire.
Step 2: Clear the Keypad’s Memory (If Necessary)
If you’ve used your Chamberlain garage door opener keypad before and want to reset it, you should clear the keypad’s memory first. This ensures that the keypad isn’t connected to a previous PIN or opener.
- Press and Hold the “Program” Button on the Keypad: Most Chamberlain keypads have a “Program” button. Press and hold this button for about 30 seconds or until the keypad’s LED light turns off. This indicates that the memory has been cleared.
Step 3: Activate the Learn Button on the Opener
Now that the keypad is ready to be programmed, it’s time to activate the learn button on your garage door opener.
- Press the Learn Button on the Opener: Press and release the learn button on your Chamberlain garage door opener. This will activate the programming mode, and the learn button’s LED light will begin to blink.Tip: You have about 30 seconds to complete the next step before the learn button stops blinking. If you miss this window, you’ll need to press the learn button again.
Step 4: Enter the Desired PIN Code on the Keypad
Now, it’s time to enter the PIN code that you’d like to use with your Chamberlain garage door opener keypad.
- Enter a Four-Digit PIN Code: On the keypad, enter a four-digit PIN code that will allow access to your garage door. It’s important to choose a PIN code that is unique and secure. Avoid using easily guessed combinations like “1234” or “0000.”
- Press the “Enter” Button: After you’ve entered your desired PIN code, press the “Enter” button on the keypad to complete the programming process.
Step 5: Test the Keypad
Once you’ve programmed the keypad with your chosen PIN code, it’s time to test it.
- Enter Your PIN on the Keypad: To verify that the keypad has been programmed correctly, enter your PIN code on the keypad.
- Press Enter: Once you’ve entered the PIN, press the “Enter” button. If the programming was successful, the garage door should open or close depending on the previous position of the door.
If the door doesn’t open or close, try reprogramming the keypad using the same steps, making sure to press the correct buttons and enter the right code.
Troubleshooting Common Keypad Programming Issues
If you’re having trouble programming your Chamberlain garage door opener keypad, there are a few common issues to check for:
- Keypad Not Responding: If the keypad doesn’t seem to be responding to your input, ensure that the keypad is properly powered and that you’re entering the correct PIN.
- Learn Button Not Blinking: If the learn button on the garage door opener doesn’t start blinking when pressed, try pressing it again. If it still doesn’t blink, there may be an issue with the opener’s wiring or the learn button itself.
- Failed Test: If your door doesn’t open or close after entering the PIN, try reprogramming the keypad, ensuring that all steps are completed properly.
- Wrong PIN: If you’ve forgotten your PIN, don’t panic. You can reset the keypad by following the manufacturer’s instructions for clearing the keypad’s memory and starting the programming process again.
Additional Tips for Programming Your Chamberlain Keypad
- Secure Your PIN: Make sure that your PIN is something secure and difficult to guess. Avoid using easy combinations like your address, birthdate, or common number patterns.
- Update the PIN Regularly: To ensure security, you may want to update your PIN code from time to time. This is especially important if you’ve shared the code with a visitor, family member, or service provider.
- Use Temporary Codes: Some Chamberlain keypads offer the ability to create temporary PIN codes. This is helpful if you want to give a visitor access to your garage for a limited time.
- Check the Manual: Always refer to the user manual for your specific Chamberlain model if you encounter difficulties. The manual will provide more details and troubleshooting steps specific to your opener and keypad.
Conclusion
Programming a Chamberlain garage door opener keypad is a simple and straightforward process. By following the steps outlined in this guide, you can easily set up your keypad and enjoy the convenience of keyless entry to your garage. Whether you’re installing a new keypad or reprogramming an existing one, the process ensures that your garage is secure and easily accessible.
Remember to test your keypad regularly, choose a secure PIN, and update it as needed. With proper programming and maintenance, your Chamberlain keypad will continue to function smoothly and provide secure access for years to come.
Leave a Reply