When it comes to maintaining your Chamberlain garage door opener, one essential task that every homeowner should know is how to change the battery. While garage door openers are designed to last for many years, the battery powering the remote control and backup system may eventually run out of power. If you find that your garage door remote is no longer working or your opener’s backup system isn’t activating during power outages, it’s likely time to replace the battery.
In this article, we’ll walk you through the process of replacing the battery in your Chamberlain garage door opener, as well as tips on maintaining the opener and remote to ensure they operate at their best.
Why Change the Battery in Your Chamberlain Garage Door Opener?
Before we dive into the specifics of replacing the battery, let’s first understand why this is an important task. The battery in your Chamberlain garage door opener serves several purposes:
- Backup Power: Many Chamberlain openers come with a backup battery that allows your garage door to function during power outages. If this battery dies, you won’t be able to open or close your garage door when the power is out.
- Remote Control Power: Your remote control for the garage door opener is powered by a battery, and when that battery is running low, your remote may stop working. Replacing the battery ensures that your remote continues to function properly.
- Improved Performance: A fresh battery ensures that your opener and remote will work efficiently, minimizing issues such as delayed response or complete failure to open or close the door.
Now that you know why it’s important, let’s take a look at how to change the battery in your Chamberlain garage door opener.
How Do You Change Battery In Chamberlain Garage Door Opener?
Changing the battery in your Chamberlain garage door opener is a relatively simple task that most homeowners can do themselves. Below, we’ll guide you step by step through the process.
1: Identify the Type of Battery You Need
The first step in replacing the battery is to know which type of battery your Chamberlain garage door opener uses. The two main types of batteries involved in the opener system are:
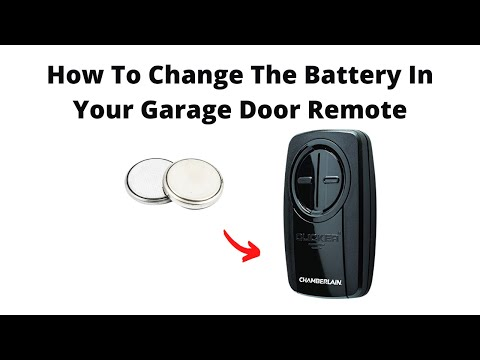
- Remote Control Battery: The remote for your Chamberlain garage door opener usually requires a 3V CR2032 coin-cell battery or something similar, depending on the model. You can find this information in the user manual or on the battery compartment of the remote.
- Backup Battery for Opener: If your Chamberlain opener has a backup battery, it’s typically a 12V battery designed to provide power to the opener during a power outage. Check your model’s specifications to determine which type of backup battery it uses.
Once you’ve identified the type of battery needed, you can purchase the replacement from most hardware stores, online retailers, or directly from Chamberlain.
2: Prepare for the Battery Replacement
Before you begin replacing the battery, ensure that the garage door opener is turned off. For safety purposes, disconnect the power supply by unplugging the opener from the wall outlet or switching off the breaker to the garage door opener.
Gather the necessary tools, which typically include:
- A small flathead screwdriver (for the remote)
- A wrench or screwdriver (for the backup battery in the opener)
- Replacement battery
- Safety glasses and gloves (optional)
3: Replace the Remote Control Battery
Now that you’ve prepared the necessary tools, let’s start with the remote control.
- Open the Remote Control: Most Chamberlain remotes have a small compartment on the back that can be opened using a flathead screwdriver or by gently prying it open with your fingers. Some remotes may have a small screw holding the compartment closed, so use the screwdriver to remove it.
- Remove the Old Battery: Once the compartment is open, remove the old battery. Take note of the orientation of the battery, as the new battery will need to be installed the same way.
- Install the New Battery: Place the new battery into the compartment, ensuring it is oriented correctly, with the positive side facing up (or as indicated in the battery compartment). Press it gently into place.
- Close the Compartment: Once the new battery is installed, close the battery compartment and secure it with the screw (if applicable). Your remote control should now be ready to use again.
4: Replace the Backup Battery in the Opener
The next step is replacing the backup battery inside the actual garage door opener unit. This is a bit more involved than changing the remote battery, but it’s still a manageable task.
- Locate the Backup Battery: First, locate the backup battery in your Chamberlain opener. In many models, the backup battery is inside the motor unit, typically behind a panel or door on the opener. If you are unsure where the backup battery is located, refer to your user manual for specific instructions.
- Remove the Panel: Use a screwdriver to remove the screws or clips holding the panel in place. Once the panel is removed, you’ll be able to access the backup battery.
- Disconnect the Old Battery: The backup battery is usually connected with two wires, which are secured using wire connectors. Use a wrench or screwdriver to disconnect the wires from the old battery. Take care to note how the wires are connected, as you’ll need to connect the new battery in the same way.
- Install the New Backup Battery: Once the old battery is removed, place the new backup battery into the compartment, and connect the wires to the new battery terminals. Make sure the connections are secure.
- Reassemble the Opener Unit: Once the new battery is installed, replace the panel or cover on the opener and secure it with the screws or clips you removed earlier.
5: Test the Opener and Remote
After you’ve replaced both the remote and backup batteries, plug the garage door opener back into the electrical outlet or flip the breaker back on. Test the opener by pressing the remote control button to ensure that the door opens and closes smoothly.
If your opener has a backup battery system, test it by turning off the power at the circuit breaker or unplugging the opener to simulate a power outage. If the backup battery is functioning properly, the opener should still work when the power is off.
Troubleshooting Tips
If your remote or opener still isn’t working properly after replacing the battery, try these troubleshooting tips:
- Reprogram the Remote: Sometimes, after replacing the battery, the remote may need to be reprogrammed. Refer to your user manual for instructions on how to reprogram the remote to your opener.
- Check the Battery Orientation: Double-check the battery orientation in both the remote and backup battery. Installing the battery in the wrong orientation may prevent the opener from functioning.
- Ensure Secure Connections: For the backup battery, ensure that the wire connections are secure and properly attached to the terminals.
- Test the New Battery: If the opener or remote still isn’t working, try using a multimeter to test the new batteries and make sure they are working properly.
Conclusion
Replacing the battery in your Chamberlain garage door opener is an essential part of regular maintenance. By following the steps outlined above, you can easily change the battery in both your remote and backup system, ensuring that your opener continues to function properly, even during power outages. Whether you’re replacing the remote control battery or the backup battery in the opener, the process is straightforward and can be completed in just a few steps.
By keeping your batteries fresh and replacing them as needed, you’ll extend the lifespan of your Chamberlain garage door opener and avoid costly repairs or malfunctions.
Leave a Reply