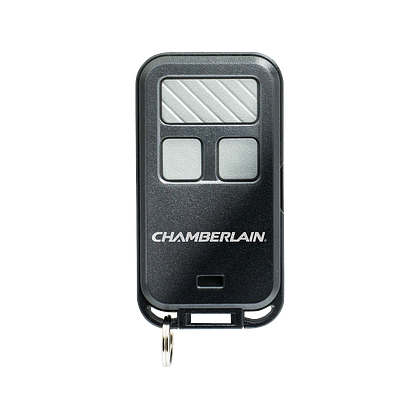
If you’ve recently purchased a Chamberlain garage door opener or are having trouble programming your existing remote, you might be wondering, How do I program my Chamberlain garage door opener remote? This is a common question, and fortunately, programming your Chamberlain garage door opener remote is a straightforward process. In this guide, we will walk you through all the necessary steps to successfully program your remote, troubleshoot common issues, and provide helpful tips for maintaining the opener’s performance.
Whether you’ve lost your remote, need to replace the batteries, or want to add a new remote to your system, this article will answer all your questions about how to program your Chamberlain garage door opener remote.
Why Program Your Chamberlain Garage Door Opener Remote?
Programming your Chamberlain garage door opener remote is crucial for a variety of reasons. The remote control is the most convenient way to open and close your garage door without needing to exit your vehicle. By programming your remote, you can ensure that it communicates correctly with the opener, providing reliable performance every time you use it.
If you’ve recently moved into a new home, replacing your opener, or adding additional remotes, learning how to program your Chamberlain garage door opener remote is essential for proper functionality.
How Do I Program My Chamberlain Garage Door Opener Remote?
Step 1: Locate the “Learn” Button
To program your Chamberlain garage door opener remote, the first thing you need to do is locate the “Learn” button on the opener. The location of this button depends on the specific model of your Chamberlain garage door opener, but it is usually located on the back or the side of the motor unit. Here’s how you can find it:
- For most Chamberlain models: The “Learn” button is typically a small, square button that is green, orange, red, or purple, depending on the model.
- On the motor unit: The button may be located near the antenna or near the light bulb of the opener.
Once you locate the Learn button, you can proceed with the next steps.
Step 2: Clear the Remote’s Memory (Optional)
Before programming a new remote, it’s a good idea to clear the memory of the opener to remove any previously programmed remotes. This is especially useful if you’re adding a new remote or resetting the system. Here’s how to do it:
- Press and hold the “Learn” button until the indicator light next to it turns off (usually 6-10 seconds). This will clear all stored codes from the opener.
- If you only need to add a new remote, you can skip this step.
Step 3: Program the Remote
Now that the system is ready, you can begin programming the remote. Follow these steps carefully to ensure a successful connection:
- Press the “Learn” Button: Press the Learn button on the garage door opener. The indicator light should turn on, signaling that the opener is ready to accept a new remote signal.
- Press the Remote Button: Within 30 seconds of pressing the Learn button, press and hold the button on the remote that you want to program. Hold the button until the opener’s lights blink or you hear two clicks. This means that the remote has been successfully programmed.
- Test the Remote: After programming, press the remote button to check if the garage door opens and closes. If it works correctly, the programming was successful.
Step 4: Repeat the Process (If Needed)
If you have additional remotes to program, repeat the process for each one. The opener can store multiple remotes, so you can program as many as you need by following the steps above.
Step 5: Close the “Learn” Button Programming Mode
Once you’ve finished programming all remotes, the Chamberlain garage door opener will automatically exit programming mode after 30 seconds of inactivity. You can also press the Learn button once more to exit programming mode manually.
Troubleshooting: Common Issues When Programming a Chamberlain Remote
Despite the straightforward process, you may encounter some issues when trying to program your Chamberlain garage door opener remote. Here are some troubleshooting tips:
1. Remote Not Programming Properly
If the remote isn’t programming, ensure the following:
- Check the Batteries: Ensure that the batteries in the remote are fresh and inserted correctly. Weak or dead batteries can prevent the remote from programming.
- Ensure You Are Within Range: Be sure that you are close enough to the opener (typically within 10-15 feet).
- Press the Remote Button Long Enough: Sometimes, the button on the remote needs to be pressed for a longer time. Hold the button until the opener lights blink or you hear a click.
2. The Opener Doesn’t Respond to the Remote
If your Chamberlain garage door opener doesn’t respond after programming the remote:
- Verify the Code: Sometimes, the wrong code may have been programmed. Try repeating the programming process.
- Check the “Learn” Button: Ensure the Learn button was pressed correctly and the indicator light turned on.
- Reset the System: If you continue to have trouble, try resetting the system by holding the Learn button for 6-10 seconds to clear the memory and then reprogram the remote.
3. Only One Remote Is Working
If only one remote is functioning, make sure that you’ve followed the programming steps for each remote. Sometimes, if you don’t press the Learn button and remote button within the 30-second window, the system may not store the code properly.
4. The Garage Door Is Moving Erratically
If the garage door opens or closes erratically after programming the remote, this may be due to incorrect programming or interference from other devices. Try reprogramming the remote and clearing the system’s memory to eliminate any interference or errors.
Tips for Maintaining Your Chamberlain Garage Door Opener Remote
To ensure that your Chamberlain garage door opener remote continues to function smoothly, follow these maintenance tips:
1. Regularly Check the Batteries
Replace the batteries in the remote control every 6-12 months, or sooner if the range begins to decrease or the remote isn’t working consistently.
2. Keep the Remote Clean
Clean the exterior of the remote control with a soft cloth to remove dust, dirt, or grime that may affect its performance. Avoid using harsh chemicals or abrasives that could damage the remote.
3. Store the Remote Properly
If you carry the remote in your car, make sure it’s stored in a secure location, such as a console or glove compartment, to avoid damage. Also, ensure it’s not exposed to extreme temperatures.
4. Avoid Interference
Other electronic devices, such as Wi-Fi routers, can sometimes interfere with your garage door opener’s signal. If you experience issues with your opener, ensure there are no large objects or devices that could be blocking the signal.
Conclusion
Programming your Chamberlain garage door opener remote is a simple task that can be completed in just a few steps. By following the instructions in this guide, you can ensure that your remote is set up properly and works seamlessly with your garage door opener. If you encounter any issues, the troubleshooting tips will help you resolve them quickly, ensuring smooth operation.
Whether you’re adding new remotes, replacing batteries, or resetting the system, understanding how to program your Chamberlain garage door opener remote is essential for maintaining convenient access to your garage.
Leave a Reply