When it comes to modern convenience and smart technology, the Chamberlain Corner to Corner Garage Door Opener is leading the way. This revolutionary opener uses powerful LED lighting and intelligent features to provide homeowners with a premium garage experience. If you’ve just purchased one and are ready to install it yourself, you’re in luck—Chamberlain Corner to Corner Garage Door Opener video installation resources make DIY setup easier than ever.
In this comprehensive guide, we will walk you through everything you need to know about installing your opener, understanding the video tutorials, and what to expect from the installation process. Whether you’re a seasoned DIYer or a first-time installer, this article is designed to help you succeed.
Read too: Can You Upgrade a Chamberlain Garage Door Opener Keypad? Here’s What You Need to Know
Chamberlain Corner To Corner Garage Door Opener Video Installation – Why It’s So Popular
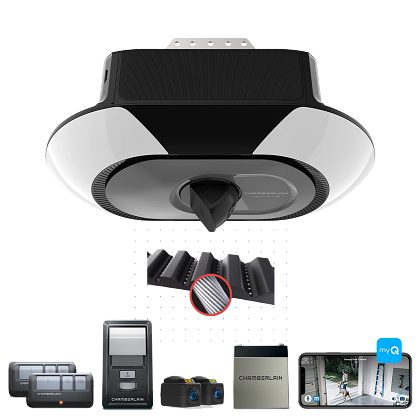
The Chamberlain Corner to Corner (C2C) model is known for its innovative lighting system that shines light into every corner of the garage. It combines power, quiet operation, and smart technology with integrated Wi-Fi, allowing you to control your garage door from anywhere using your smartphone.
But what truly sets this opener apart is how easy it is to install, especially with the help of Chamberlain’s detailed video installation guides.
Key Features:
- Corner-to-Corner LED Lighting: 3,100 lumens of brightness fills the entire garage space.
- Belt Drive System: Ultra-quiet performance, ideal for garages attached to living spaces.
- myQ Connectivity: Control and monitor your garage from your smartphone.
- Integrated Camera (on select models): For added security and real-time video feed.
The Importance of Chamberlain’s Video Installation Guide
Chamberlain provides official video installation tutorials on its website and YouTube channel. These step-by-step videos offer visual guidance that complements the printed manual, making it easier to understand complex parts of the process.
Why Video Installation Is Better:
- Visual clarity: See how brackets and components fit together in real-time.
- Time-saving: Avoid mistakes by watching each step beforehand.
- Great for first-timers: Even without technical experience, the video helps you follow along confidently.
- Updated content: Videos are regularly refreshed to reflect newer models and improvements.
Step-by-Step Guide: Chamberlain Corner To Corner Garage Door Opener Video Installation
This section will walk you through the standard steps shown in the Chamberlain Corner To Corner Garage Door Opener video installation, highlighting the most important parts of the process.
1. Preparation Before Installation
Before diving into the setup, gather your tools:
- Stepladder
- Power drill
- Wrench set
- Level
- Safety glasses
- Screwdriver
Safety Tip: Always disconnect power to your existing garage door opener before removing it.
2. Unboxing the Chamberlain Corner to Corner Opener
Inside the box, you’ll find:
- Motor unit with integrated LED lighting
- Belt rail assembly
- Wall-mounted control panel
- Safety sensors
- Mounting brackets
- Hardware kit
Make sure to lay out all parts and verify them with the manual before beginning the installation.
3. Assembling the Rail and Belt
This is one of the most detailed parts in the video:
- Connect the rail sections together.
- Feed the belt through the rail and attach it to the trolley and pulley system.
- Tighten the belt with the tensioner. Be careful not to overtighten.
🎥 In the video tutorial, Chamberlain shows a close-up of how the tensioner should align, which can help avoid over-tightening or misalignment.
4. Mounting the Motor Unit
- Use the included angle brackets to secure the motor to the ceiling joists.
- Ensure the motor is level and positioned appropriately above the garage door.
- The video emphasizes measuring the clearance between the door and opener—usually 2 to 4 inches of headroom is ideal.
5. Installing the Header Bracket and Door Arm
- Attach the header bracket to the wall above the garage door.
- Connect the curved door arm to the trolley, and the straight arm to the door.
- Chamberlain’s video shows exactly how the arms should overlap and connect to ensure smooth movement.
6. Wiring the Safety Sensors
- Mount the sensors on both sides of the garage door opening, no more than 6 inches above the floor.
- Run the wires along the wall and connect them to the opener’s terminals.
- The video gives detailed insight into routing the wires for a neat, clean appearance.
7. Wiring the Wall Control Panel
- Mount the wall panel near the door to the home.
- Run low-voltage wire to the opener.
- Chamberlain recommends avoiding sharp bends in the wire path—this is shown clearly in the installation video.
8. Powering and Testing the Unit
- Plug the opener into a ceiling outlet.
- Watch the LED lights power up from corner to corner—a signature feature!
- Test the garage door operation using the wall control and remote.
- Adjust the up/down travel limits and force sensitivity using the manual buttons on the opener.
Final Steps: Connecting to the myQ App
One of the biggest advantages of the Chamberlain Corner to Corner model is the myQ connectivity.
- Download the myQ app from the App Store or Google Play.
- Create an account or log in.
- Follow in-app instructions to connect the opener to your home Wi-Fi.
- Test remote access, monitor history, and set smart alerts.
💡 Bonus Tip: Some Chamberlain installation videos include setup instructions for the app—don’t skip this part if you want smart control features.
Common Mistakes to Avoid During Installation
Even with great video instructions, some users make avoidable errors. Here’s what to watch for:
- Incorrect Belt Tension: Leads to jerky door movement or premature wear.
- Misaligned Safety Sensors: Prevents door from closing.
- Mounting Too Close to Door: Can result in door hitting the opener.
- Skipping the Manual Setup Steps: The video complements, but doesn’t replace, the printed manual.
Who Should Use the Video Installation?
While anyone can benefit from video instructions, they are especially helpful for:
- DIY homeowners with limited experience
- Visual learners who prefer seeing steps over reading them
- People upgrading from older units who need guidance on new features
- Installers needing clarification on new Chamberlain systems
Benefits of the Corner-to-Corner Design
The unique LED lighting system is one of the biggest upgrades over traditional openers:
- Fills entire garage with bright light
- No separate lighting needed
- Low energy consumption
- No bulbs to replace
This makes late-night garage activities safer and easier, whether you’re parking, unloading groceries, or working on a project.
Maintenance Tips After Installation
After you’ve finished the Chamberlain Corner To Corner Garage Door Opener video installation, keep your opener running smoothly with these quick tips:
- Lubricate moving parts every 6 months
- Check belt tension and adjust if needed
- Clean LED light panels with a soft cloth
- Test safety sensors monthly
Is Professional Installation Still Necessary?
In many cases, no—the video installation is detailed enough for most DIYers. However, consider professional help if:
- You have an old garage door track system
- Your ceiling structure is non-standard
- Electrical wiring is needed for a new outlet
Final Thoughts
Thanks to the Chamberlain Corner To Corner Garage Door Opener video installation, more homeowners than ever are installing their own smart garage systems. With clear step-by-step visual guidance, intuitive hardware, and tech-savvy features like myQ integration and LED lighting, the C2C opener is a top-tier product for those looking for convenience, safety, and smart home integration.
If you’re ready to tackle the installation yourself, grab your tools, pull up the video, and follow along—you’ll be enjoying your new system in just a few hours.
Leave a Reply