Garage door openers have come a long way in terms of safety and automation. Among the top-tier systems, Chamberlain garage door openers stand out for their advanced security features—one of the most essential being the safety reversing sensors. These small devices, also known as photo eyes, are designed to prevent the door from closing when something is in its path. If these sensors become misaligned or obstructed, your garage door may refuse to close, posing an inconvenience and even a safety hazard.
This comprehensive guide will walk you through everything you need to know about aligning safety reversing sensors on Chamberlain garage door opener. Whether you’re facing blinking lights, an unresponsive door, or unexpected reversals, this guide will help you get your system back on track—safely and efficiently.
Why Safety Reversing Sensors Matter
The safety reversing sensors play a crucial role in preventing injury and property damage. Located near the bottom of your garage door tracks, these infrared sensors create an invisible beam between them. If the beam is broken, the opener automatically stops or reverses the door’s motion.
Read too: How Many Remotes Can A Chamberlain Garage Door Opener Have? Understaanding the Limits and Options
When working correctly, they:
- Prevent accidents involving children, pets, or objects
- Ensure compliance with safety regulations and building codes
- Prolong the lifespan of the garage door opener by preventing unnecessary strain
- Improve daily convenience by ensuring reliable functionality
That’s why aligning safety reversing sensors on Chamberlain garage door opener is a necessary skill for every homeowner.
Signs Your Sensors Need Realignment
Misaligned or faulty sensors can cause your garage door to:
- Close partway and then reverse
- Not close at all
- Blink the opener lights repeatedly
- Flash error codes on smart openers
- Emit a steady or blinking orange or green LED light
If you observe any of these signs, chances are your safety sensors need attention.
Tools You’ll Need
Before starting the alignment process, gather the following:
- A Phillips-head screwdriver
- Measuring tape
- A level (laser or bubble level)
- Cleaning cloth or soft brush
- Zip ties or twist ties (optional)
- A step ladder (if necessary)
Make sure the garage is well-lit and free of any obstructions around the sensors.
How the Sensors Work
Chamberlain safety sensors consist of two units:
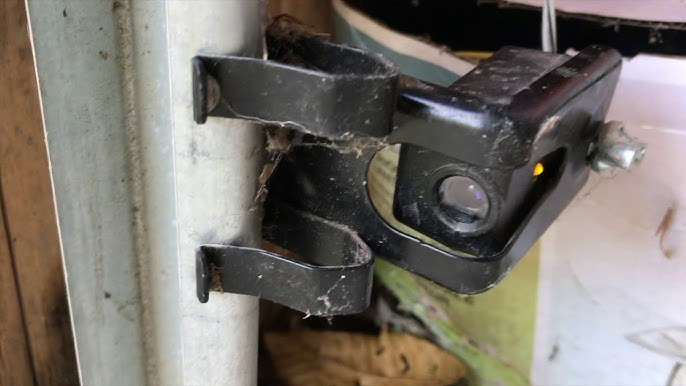
- Transmitting Sensor (usually with an amber light): Sends an infrared beam across the door opening.
- Receiving Sensor (usually with a green light): Detects the beam from the transmitting sensor.
If the receiving sensor doesn’t detect the beam, it assumes something is blocking the door and reverses or halts operation.
Proper alignment ensures that the beam travels in a straight line between the two sensors, uninterrupted.
Step-by-Step Guide to Aligning Safety Reversing Sensors On Chamberlain Garage Door Opener
Now let’s go through the complete process for aligning safety reversing sensors on Chamberlain garage door opener.
Step 1: Disconnect Power to the Opener
For your safety, start by unplugging the garage door opener or turning off the circuit breaker. This ensures there’s no accidental movement during the alignment process.
Step 2: Inspect the Sensors for Obstructions or Dirt
Use a dry cloth or brush to gently clean the lens of each sensor. Dust, spider webs, or debris can interfere with the infrared beam and mimic misalignment.
Also check for:
- Loose wiring
- Cracked housings
- Misplaced brackets
- Water damage
Address these issues before proceeding with alignment.
Step 3: Check for Blinking or Steady Lights
Observe the LED lights on each sensor:
- A steady green and amber light means the system is aligned and operational.
- A blinking green light indicates the sensors are not aligned or the beam is blocked.
Use this visual cue throughout the alignment process to know when you’ve succeeded.
Step 4: Loosen the Sensor Mounting Screws
Using your screwdriver, gently loosen the wing nuts or mounting brackets on both sensor units. This allows you to reposition them without fully detaching the hardware.
Make sure not to over-loosen—you just want enough flexibility to make fine adjustments.
Step 5: Position the Sensors at the Same Height
Use your measuring tape to ensure both sensors are installed at equal height—typically 6 inches from the floor. Mark the height on the garage door track with painter’s tape or pencil if necessary.
Tip: Some newer Chamberlain models come with pre-measured alignment indicators built into the brackets.
Step 6: Align the Sensors with a Level
Use a level to ensure both sensors are facing directly at each other in a straight horizontal line. A laser level can be especially helpful here.
Move each sensor slightly until the green LED light on the receiving sensor turns solid—this indicates a successful connection with the transmitter.
Step 7: Tighten the Sensors in Place
Once properly aligned and both lights are solid, gently tighten the mounting brackets or wing nuts. Be careful not to overtighten, as this could throw off the alignment again.
Use zip ties to manage any loose sensor wires to avoid future disruptions.
Step 8: Reconnect Power and Test the Door
Plug the opener back in or restore power at the breaker. Test the door using the wall-mounted control or remote.
- Try to close the door. If it operates smoothly without reversing, your alignment is successful.
- Place an object in the sensor path to ensure the system still reverses properly when obstructed.
Troubleshooting Alignment Issues
If the sensors still don’t work after alignment, here are a few things to check:
1. Wiring Damage
Look for pinched or broken wires between the sensor and the opener. Replace or repair as needed.
2. Sunlight Interference
Direct sunlight on the sensors can interfere with the infrared beam. Use small shades or reposition slightly to minimize glare.
3. Sensor Bracket Damage
Bent brackets can prevent proper alignment. If damaged, replace with new compatible parts from Chamberlain.
4. Faulty Sensors
If one or both lights remain off or blinking after alignment and cleaning, the sensor may be faulty and require replacement.
Preventive Maintenance Tips
- Clean sensor lenses monthly
- Inspect brackets and wiring every 3–6 months
- Ensure the garage door track remains free from rust or debris
- Label the sensors in case they get bumped during storage or repairs
Regular upkeep will minimize misalignment and improve overall performance.
Smart Features for Monitoring Sensors
If you use a Chamberlain opener with MyQ technology, you can monitor your garage door’s status via a mobile app. While MyQ doesn’t directly diagnose sensor alignment, it helps identify unusual activity patterns that may be related.
Some advanced models may even notify you if the door fails to close, prompting a sensor inspection.
When to Call a Professional
If after repeated alignment attempts your door still refuses to operate correctly, or if wiring repairs are beyond your skill level, it’s best to call a Chamberlain-certified technician.
They can:
- Replace defective sensors
- Troubleshoot logic boards
- Perform a complete system diagnostic
- Ensure code compliance and safe operation
Conclusion
Learning how to align safety reversing sensors on Chamberlain garage door opener is a simple yet crucial task for every homeowner. It ensures your garage door functions safely, protects your family and pets, and keeps your garage opener system in top shape.
From recognizing signs of misalignment to adjusting the sensors with precision and care, this guide equips you with everything you need. Stay proactive, keep your sensors clean and properly aligned, and enjoy the reliability that Chamberlain is known for.
Leave a Reply