When it comes to home automation and security, Chamberlain is a name trusted by millions of homeowners across the United States. Their garage door openers combine performance, durability, and smart technology. One of the most innovative features in modern Chamberlain systems is the motion detecting control panel — a user-friendly interface designed to add convenience and enhance safety.
If you’re setting up or troubleshooting this system, you’re in the right place. This guide provides complete and easy-to-follow Chamberlain Garage Door Opener Motion Detecting Control Panel Instructions, along with helpful tips, common FAQs, and expert advice.
Read too: How Many Remotes Can A Chamberlain Garage Door Opener Have? Understaanding the Limits and Options
What Is the Chamberlain Motion Detecting Control Panel?
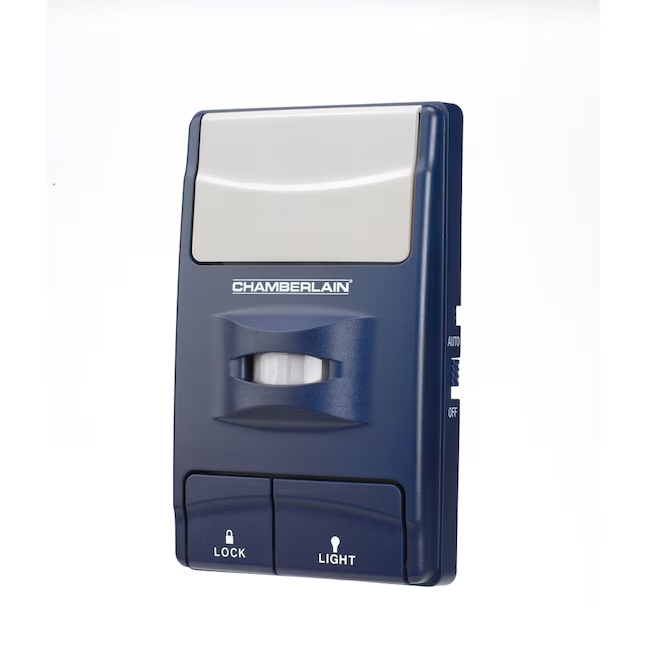
The motion detecting control panel is an enhanced wall control panel included with select Chamberlain garage door opener models. It allows users to not only operate the garage door but also take advantage of advanced features like:
- Motion detection lighting
- Lockout functions (vacation mode)
- Timer-to-close settings
- Garage status monitoring
This type of control panel often comes with Smart Garage Door Openers like the Chamberlain B970, B550, or models that support MyQ technology.
Understanding and properly configuring your Chamberlain control panel ensures you get the most value from your garage automation system.
Benefits of a Motion Detecting Control Panel
Before we dive into the Chamberlain Garage Door Opener Motion Detecting Control Panel Instructions, let’s explore the key benefits:
1. Hands-Free Lighting
Motion sensors activate the garage lights automatically when movement is detected, making it safer and more convenient, especially at night or when your hands are full.
2. Enhanced Safety
The sensor can detect movement when the door is closing. If the system detects motion unexpectedly, the opener may stop the door to prevent injury or damage.
3. Energy Efficiency
Built-in timers allow users to customize how long the light stays on after motion stops, reducing electricity consumption.
4. Security Lockout Feature
The vacation lock prevents remote access while you’re away, adding an extra layer of home security.
5. Time-to-Close Setting
This feature allows the door to automatically close after a pre-set period — perfect for forgetful users or busy households.
Chamberlain Garage Door Opener Motion Detecting Control Panel Instructions
Let’s walk through a complete setup and operational guide for the Chamberlain motion detecting wall control panel. Depending on your model, slight variations may apply, but the core steps remain consistent.
1. Installing the Control Panel
Tools Needed:
- Phillips screwdriver
- Wire strippers
- Drill (if needed)
Installation Steps:
- Turn Off Power: Disconnect power from the garage door opener to prevent electrical shock.
- Mount the Panel: Use provided screws to secure the control panel to the wall near the garage door entrance (usually 5 feet above the floor).
- Connect Wires:
- Strip 1/2 inch of insulation from the end of the wires.
- Connect the red and white wires from the opener to the terminals on the back of the panel.
- Polarity is not important — either wire can go to either terminal.
- Restore Power: Once wiring is secure, plug the opener back in.
- Test: Press the control button to confirm the door opens and closes.
2. Setting Up Motion Detection
Most Chamberlain motion detecting control panels automatically enable motion detection by default. However, you can customize or reset these settings.
To Activate or Deactivate Motion Detection:
- Press and hold the light button until the LED blinks once (approx. 5 seconds).
- Press the button again to toggle motion detection on or off.
- When activated, a person walking into the garage will trigger the light.
Troubleshooting Tip: If the light doesn’t respond, check if the lens is clean and not obstructed.
3. Setting the Time-to-Close Feature
This advanced setting allows your garage door to close automatically after a selected time delay.
Steps:
- Press the menu button on the control panel.
- Navigate to “Timer-to-Close” settings using the arrow buttons.
- Choose the desired time delay (1, 5, or 10 minutes).
- Press Enter to confirm.
Note: The safety sensors must be working properly for this function to activate. If the sensors are blocked or misaligned, the time-to-close will not operate.
4. Using the Lock (Vacation) Feature
To improve security while you’re on vacation or away for an extended time:
- Press and hold the lock button until the LED light turns on.
- This disables all remote controls and wireless keypads.
- Press and hold again to deactivate.
5. Customizing Light Timing
You can set how long the lights stay on after motion is no longer detected.
Steps:
- Press the menu button.
- Navigate to “Light Settings”.
- Select the time (1.5, 2.5, 4.5 minutes).
- Press Enter to save.
Common Problems and How to Fix Them
Understanding these common issues can save time and money:
Motion Sensor Not Working
- Ensure the sensor is unobstructed.
- Clean the lens with a soft cloth.
- Confirm motion detection is turned on.
- Power cycle the opener and panel.
Control Panel Not Responding
- Check wiring connections.
- Verify the LED indicator light is active.
- Replace panel if necessary (especially in older models).
Timer-to-Close Not Functioning
- Inspect safety sensors.
- Make sure the feature is turned on in settings.
- Reset control panel by disconnecting power and reconnecting after 30 seconds.
Compatible Models and Variants
These Chamberlain models often include or are compatible with motion detecting control panels:
- Chamberlain B970
- Chamberlain B1381
- Chamberlain RJO70
- Chamberlain C870
- Chamberlain LW9000 Series
If your garage opener is MyQ-compatible, there’s a high chance it supports motion control with a compatible panel (e.g., Chamberlain 889LM or 041A7928).
Always consult the manual or Chamberlain website for compatibility checks.
Smart Integration and Mobile Alerts
When paired with the MyQ Smart Hub, the motion detecting control panel can also send real-time alerts to your smartphone when motion is detected. This is useful for:
- Knowing when someone enters the garage
- Monitoring activity when you’re not home
- Automatically turning on smart lights
To activate smart features, download the MyQ app, register your device, and follow the prompts to connect your control panel through the opener.
When to Replace Your Motion Detecting Panel
Consider replacement if:
- Buttons are non-responsive
- Motion sensor fails consistently
- LED indicator is dead
- You’ve upgraded to a newer opener
Chamberlain sells replacement panels separately, and most are backward compatible within the same product generation.
Conclusion: Take Full Advantage of Your Chamberlain Garage Door Opener
The Chamberlain Garage Door Opener Motion Detecting Control Panel Instructions outlined above are designed to empower homeowners to make the most of their garage systems. With the right setup, this panel offers unmatched convenience, safety, and control.
From motion-activated lighting to secure vacation mode and smart mobile integration, Chamberlain gives you a tool that does much more than just open a garage door. Whether you’re setting it up for the first time or troubleshooting an issue, having these instructions on hand can make the experience simple and stress-free.
Leave a Reply