The Chamberlain Garage Door Opener Model 1260Lm is a trusted unit that many homeowners rely on daily. Known for its durability and smooth performance, it’s designed to provide long-term, reliable operation. However, like all mechanical systems, wear and tear are inevitable. One of the most common issues users face over time is the drive gear wearing out.
If your garage door opener motor runs but the door doesn’t move, chances are your drive gear is stripped or broken. Fortunately, replacing the drive gear isn’t as difficult or expensive as it sounds—especially if you’re comfortable with basic tools and a little DIY.
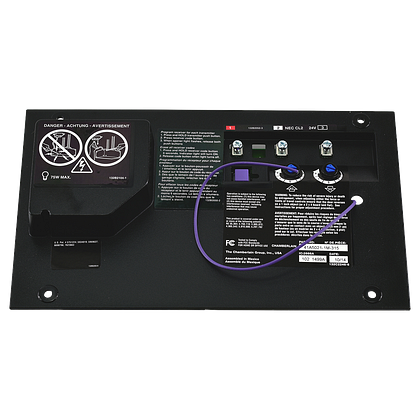
Read too: How Many Remotes Can A Chamberlain Garage Door Opener Have? Understaanding the Limits and Options
In this in-depth guide, we’ll walk you through everything you need to know about Chamberlain Garage Door Opener Model 1260Lm Drive Gear Replacement—from signs of a failing gear, tools needed, the full replacement procedure, safety tips, and post-repair testing.
Why Does the Drive Gear Fail?
The drive gear is the heart of your garage door opener’s mechanical operation. It connects the motor to the chain or belt drive, allowing the opener to lift and lower the door.
Common causes of drive gear failure:
- Normal wear over time (most fail after 8–15 years)
- Lack of lubrication on the rail or drive screw
- Cold climates causing added strain
- Garage door imbalances or broken springs
- Frequent use, especially in multi-car households
When the gear teeth wear out or strip completely, the motor may sound like it’s working, but nothing happens—a frustrating experience when you’re in a hurry or caught in bad weather.
How to Perform Chamberlain Garage Door Opener Model 1260Lm Drive Gear Replacement
Replacing the drive gear on a Chamberlain 1260Lm opener is a mid-level DIY task. Expect the process to take 60–90 minutes depending on your comfort with tools.
✅ Tools & Parts You’ll Need:
- Replacement drive gear kit (specific to Chamberlain 1260Lm)
- Flathead & Phillips screwdrivers
- 1/4” and 5/16” nut drivers or socket set
- Pliers
- White lithium grease
- Stepladder
- Work gloves
- Permanent marker or tape (to mark assembly)
You can buy a Chamberlain 1260Lm gear replacement kit online or at a local hardware store. It usually includes the gear, worm gear, shaft, bushings, washers, retaining clip, and instructions.
🔧 Step-by-Step Replacement Guide
Step 1: Unplug the Garage Door Opener
Safety first. Disconnect power from the unit to avoid electrical shock or unintentional motor movement.
Step 2: Remove the Opener Cover
Use your screwdriver to take off the light lens and unscrew the main housing cover to expose the internal mechanism.
Step 3: Mark Chain or Belt Position
Before loosening any parts, use a marker or tape to mark the current position of the chain or belt for reassembly.
Step 4: Remove the Chain or Belt from the Drive Sprocket
Loosen the tensioner bolt, then slide the chain or belt off the gear housing and sprocket.
Step 5: Access the Drive Gear Assembly
Unscrew and remove the motor shaft assembly, then take out the damaged drive gear and worn components. You may see white or plastic shavings—evidence of gear deterioration.
Step 6: Install New Drive Gear
Replace all worn components using the new gear kit. Be sure to grease the new gear with white lithium grease before inserting it. Slide in the new worm gear, drive gear, bushings, and secure them with the included washers and clip.
Step 7: Reassemble the Motor Unit
Reattach the gear assembly, housing, and motor cover. Tighten all screws securely.
Step 8: Reconnect the Chain or Belt
Realign the chain/belt using your previous markings, then tighten the tensioner bolt. Make sure the chain or belt has firm but slight slack.
Step 9: Plug the Unit Back In and Test
Restore power and test the opener. The door should lift and close smoothly. You may need to reprogram the limits using the up/down adjustment screws.
Tips for a Successful Drive Gear Replacement
- Clean debris inside the opener before installing new parts.
- Grease all moving parts with white lithium grease—don’t skip this!
- If your gear wore out early, check for a door imbalance or broken spring.
- Tighten sprockets and bolts to prevent future wobbling or wear.
How to Know if You Need Chamberlain Garage Door Opener Model 1260Lm Drive Gear Replacement
Not sure if the drive gear is the problem? Here are common symptoms:
✅ Confirmed Signs:
- Motor hums but the door doesn’t move
- Loud grinding noise during operation
- Chain/belt is moving but door stays still
- Plastic shavings found near the opener housing
- You’ve already ruled out broken springs or limit switch issues
If your opener behaves this way, replacing the drive gear is almost always the fix.
Preventive Maintenance After Replacement
Once you’ve completed your Chamberlain Garage Door Opener Model 1260Lm Drive Gear Replacement, follow these practices to prolong the new gear’s life:
1. Lubricate Regularly
Apply white lithium grease to the rail, trolley, and drive gear every 6–12 months.
2. Balance the Door
Disconnect the opener and lift the garage door manually. It should stay halfway open. If not, you may need to adjust or replace torsion springs.
3. Keep the Rail Clean
Wipe down the rail and opener interior to remove dust and debris that may accelerate gear wear.
4. Avoid Excessive Opener Use
Limit how often the garage door is used unnecessarily to reduce motor strain.
When to Call a Professional
While the process is straightforward for a confident DIYer, consider hiring a professional if:
- You’re not comfortable working with electrical parts
- The opener is mounted in a tight or awkward space
- You encounter additional damage to the sprocket or rail
- Your garage door has significant weight or balance issues
FAQs About Chamberlain Garage Door Opener Model 1260Lm Drive Gear Replacement
Q: How long does a Chamberlain drive gear typically last?
A: On average, between 8–15 years, depending on climate, use frequency, and maintenance.
Q: Is the drive gear covered under warranty?
A: Chamberlain typically offers a 1–3 year warranty on parts. Check your manual or receipt.
Q: Can I reuse the old shaft or bushings?
A: It’s best to replace all moving parts at once using a complete gear kit to avoid partial failure.
Q: My opener still doesn’t work after replacement—why?
A: Check that:
- The chain/belt is aligned and tensioned
- The limit switch is correctly programmed
- All wires are securely connected
- The motor wasn’t damaged during gear failure
Q: Is the gear kit for 1260Lm the same as other Chamberlain models?
A: Some models share gear kits, but always match the exact model number to ensure compatibility.
Final Thoughts
The Chamberlain Garage Door Opener Model 1260Lm Drive Gear Replacement is a critical repair that can breathe new life into your garage opener without needing a full unit replacement. With the right parts, tools, and instructions, you can confidently handle this DIY task, saving time and money while restoring functionality.
Regular lubrication and routine maintenance can dramatically extend the lifespan of your opener’s internal parts. But when it comes time for a repair, don’t hesitate—a stripped drive gear won’t fix itself, and delaying replacement only increases the chances of damaging other components.
Let this guide be your go-to resource for keeping your Chamberlain garage door system running like new!
Leave a Reply