The garage door is often overlooked in smart home setups. Yet, it plays a vital role in security, access, and convenience. If you’re looking to elevate your garage experience, learning how to add a smart wall button to Chamberlain garage door opener can be a game-changer.
This comprehensive guide covers everything you need to know—from compatible devices and installation steps to integration with your smart home systems. Whether you’re tech-savvy or a DIY enthusiast, this guide makes the process clear and accessible.
Why Add a Smart Wall Button to Chamberlain Garage Door Opener?
Traditional garage door wall buttons offer basic functionality—open, close, and maybe a light control. But as homes evolve with smart technology, homeowners want more.
Read too: How Many Remotes Can A Chamberlain Garage Door Opener Have? Understaanding the Limits and Options
By adding a smart wall button to Chamberlain garage door opener, you can:
- Control your garage door remotely
- Monitor door status in real-time
- Receive open/close alerts
- Integrate with Alexa, Google Assistant, or Apple HomeKit
- Automate door actions based on time or location
Chamberlain is a respected brand in the garage opener space. Their devices are compatible with many smart wall button upgrades, especially with the proper setup and integration tools.
What Is a Smart Wall Button?
A smart wall button is a garage door control panel that connects to your Wi-Fi or smart home network. Unlike standard push-button models, smart versions come with advanced features like:
- LED display panels
- Motion detectors
- Temperature sensors
- Wi-Fi and Bluetooth connectivity
- Integration with smart assistants
- Compatibility with mobile apps
These wall buttons bring your garage door into your home automation ecosystem, turning it into a responsive and intelligent system.
Types of Smart Wall Buttons Compatible with Chamberlain
If you’re planning to add a smart wall button to Chamberlain garage door opener, your first step is to understand compatibility. Chamberlain garage openers typically fall into three categories:
- Standard Chamberlain Garage Door Openers (manual wall switch)
- MyQ-compatible Chamberlain Openers (built-in smart features)
- Security+ 2.0 Models (encrypted controls requiring special interfaces)
Compatible Smart Wall Buttons:
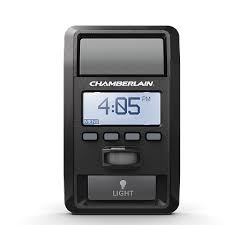
- Chamberlain Smart Control Panel (Model 880LMW)
Works with most MyQ-enabled and Security+ 2.0 Chamberlain models. - LiftMaster Smart Wall Control (Model 889LM)
Compatible with MyQ openers (LiftMaster and Chamberlain are sister brands). - 3rd Party Smart Buttons (Shelly, Sonoff with relays)
Use with caution—ensure compatibility with low-voltage and contact closure inputs. - MyQ Smart Garage Control Hub
While not a wall button per se, it enables wireless wall control through apps.
Add Smart Wall Button to Chamberlain Garage Door Opener: Step-by-Step Guide
Let’s walk through how to physically and digitally install a smart wall button for your Chamberlain garage door opener.
Step 1: Check Compatibility
Before purchase, confirm your garage opener’s model number (usually found on the back of the unit). Then, check the manufacturer’s documentation or website for compatible smart wall buttons.
If your opener supports Security+ 2.0, you must use a Chamberlain-authorized smart button.
Step 2: Turn Off Power to the Garage Door Opener
Safety first. Cut the power at the breaker or unplug the unit to avoid electrical shock during installation.
Step 3: Remove the Old Wall Button
- Unscrew and detach the existing wall control.
- Note which wires go to each terminal (typically RED and WHITE).
- Loosen the terminal screws and disconnect the wires.
Step 4: Mount the Smart Wall Button
- Mount the new smart wall button on the wall where the old one was located.
- Connect the wires to the appropriate terminals (refer to the button’s manual).
- Secure the unit to the wall with screws.
Step 5: Power Up and Program the Smart Button
- Turn power back on to your garage opener.
- If your button includes an LED panel, wait for it to boot up.
- Follow the on-screen or app-based instructions to connect it to your Wi-Fi or MyQ account.
- Test door operation to confirm successful installation.
Features You Gain When You Add Smart Wall Button to Chamberlain Garage Door Opener
Once installed, your smart wall control transforms garage access. Here are the most common features you’ll enjoy:
- Door Monitoring: Instantly see whether the garage door is open or closed.
- Timed Close: Automatically close the door after a set period.
- Motion-Activated Lighting: Lights turn on when someone enters the garage.
- Temperature Display: Check garage temperature at a glance.
- Mobile Control: Use the MyQ app or third-party apps for remote operation.
Integrating with Smart Home Assistants
Smart wall buttons are often part of larger ecosystems. By choosing the right model, you can integrate your Chamberlain garage opener with Alexa, Google Assistant, or Apple HomeKit.
🔧 Pro Tip: You may need a MyQ Home Bridge or HomeKit Adapter for full Apple HomeKit support.
Integration enables you to:
- Use voice commands like “Hey Google, open the garage door.”
- Automate routines like closing the garage at sunset.
- Receive alerts if the door is left open.
Troubleshooting Tips
Here are common issues you might face when installing a smart wall button and how to fix them:
Problem: Wall button doesn’t power on
Fix: Double-check wiring polarity and ensure power is restored to the garage opener.
Problem: Can’t connect to Wi-Fi
Fix: Ensure your wall button is in Wi-Fi range or consider adding a Wi-Fi extender.
Problem: Door won’t operate from smart button
Fix: Ensure the smart button is compatible with Security+ 2.0 systems. If not, it won’t trigger the opener.
Problem: App doesn’t recognize button
Fix: Re-pair the device through the app or reset the smart wall button according to the manual.
Advanced Features for Tech Enthusiasts
If you’re more advanced in home automation, you can extend the use of your smart wall button by:
- Creating IFTTT triggers for arrival or departure
- Connecting to a home security system
- Adding geofencing controls to open or close when you leave or arrive
- Scheduling garage lighting and door controls to save energy
Is It Worth Upgrading to a Smart Wall Button?
If you’re already invested in smart home tech, the answer is a resounding yes. A smart wall button:
- Adds convenience to everyday life
- Enhances home security
- Improves accessibility for families
- Increases home value through smart features
Plus, as more devices become interconnected, the garage should not be left behind.
Alternative Options if You Can’t Upgrade
If your Chamberlain model is not compatible with smart wall buttons, you can consider:
- Smart plug adapters for garage control
- Insteon or Z-Wave relays with third-party hubs
- Voice assistants with virtual routines
- Universal remote smart controllers (like Meross or Garadget)
While not as seamless as built-in smart wall buttons, they offer a viable path to automation.
Conclusion: Take Control with a Smart Wall Button Upgrade
Now that you understand how to add smart wall button to Chamberlain garage door opener, you’re ready to modernize your garage with smart technology. Whether your goal is convenience, automation, or peace of mind, a smart wall control is an excellent addition to your garage door setup.
With the right tools and a little bit of time, you can bring your Chamberlain garage door into the future—making it responsive, intelligent, and secure.
Leave a Reply