The Liftmaster Chamberlain 41Db002 2 garage door opener circuit board plays a critical role in ensuring the smooth and reliable operation of many LiftMaster and Chamberlain garage door opener systems. Often overlooked, this small yet powerful component acts as the brain of your opener, processing commands, responding to sensors, and managing safety features.
If your garage door opener is acting up — failing to respond, behaving erratically, or not working at all — the Liftmaster Chamberlain 41Db002 2 circuit board could be the root cause. This article explores everything you need to know about this circuit board, from functionality and installation to signs of failure, compatibility, and replacement tips.
What Is the Liftmaster Chamberlain 41Db002 2 Garage Door Opener Circuit Board?
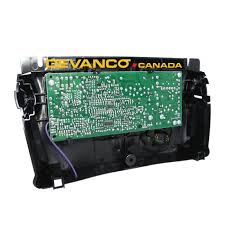
The Liftmaster Chamberlain 41Db002 2 garage door opener circuit board is a control module responsible for interpreting signals from your remote control, wall switch, keypad, and safety sensors. It regulates the motor’s operations, ensures safety protocols like automatic reversal, and handles the open/close cycles with precision.
This specific model — 41Db002-2 — is used in several older chain-driven garage door opener systems from both LiftMaster and Chamberlain, two of the most respected names in garage door technology.
Why Is This Circuit Board So Important?
This circuit board is the central processor in your garage door opener system. It manages:
- Motor control (start, stop, reverse)
- Remote signal reception
- Photo-eye safety sensor readings
- Wall switch functionality
- Security codes and learning memory
- Lights activation and delay
In essence, it’s what makes your garage door opener “smart.” Without a functioning Liftmaster Chamberlain 41Db002 2 circuit board, your opener is just a mechanical unit without direction or control.
Common Signs of a Faulty Circuit Board
If your garage door is not operating properly and you’ve already ruled out basic issues (like dead remote batteries, faulty sensors, or power outages), your Liftmaster Chamberlain 41Db002 2 garage door opener circuit board might be the culprit.
Here are some warning signs:
- Unresponsive controls: Remotes, wall buttons, or keypads stop working suddenly.
- Intermittent operation: The door works occasionally, then fails.
- Random door behavior: Door opens or closes by itself without a command.
- Burnt smell or visible damage: Indications of short circuits or burned components on the board.
- Flashing lights or error codes: LED diagnostics on the opener may indicate internal faults.
- No power to the unit: Complete system shutdown even when power supply is confirmed.
If you experience these issues, inspecting or replacing the 41Db002 2 circuit board might solve your problem.
Replacing the Liftmaster Chamberlain 41Db002 2 Garage Door Opener Circuit Board
Replacing a garage door opener circuit board sounds intimidating, but it’s actually a straightforward process for most DIY-savvy homeowners. Here’s a step-by-step guide for replacing your Liftmaster Chamberlain 41Db002 2 garage door opener circuit board:
Step 1: Safety First
Before starting, disconnect the power to your garage door opener. This prevents electrical shock or damage during installation.
Step 2: Access the Circuit Board
- Use a ladder to reach the opener motor unit.
- Remove the light lens or front cover to expose the control board compartment.
- Unscrew the mounting screws holding the old circuit board in place.
Step 3: Disconnect Wires
- Take a photo of the wiring connections to help with reassembly.
- Carefully unplug or unscrew each wire connected to the old board.
Step 4: Install the New Board
- Position the new 41Db002-2 circuit board into place.
- Reconnect wires using your reference photo.
- Reattach any covers or protective panels.
Step 5: Restore Power and Program
- Plug the opener back in or restore circuit power.
- Use the Learn button on the new board to reprogram your remote controls and keypad.
- Test your garage door opener to ensure everything functions correctly.
Replacing the Liftmaster Chamberlain 41Db002 2 garage door opener circuit board usually takes under 30 minutes and can restore full functionality to your system.
Compatibility: Which Models Use the 41Db002 2 Circuit Board?
The Liftmaster Chamberlain 41Db002 2 garage door opener circuit board is compatible with several older LiftMaster and Chamberlain chain-drive openers, including:
- LiftMaster 1245, 1246, 1255, 1265 models
- Chamberlain 7200, 7220, 7222 series
- Some Sears Craftsman units using similar technology
Always verify your model number before purchasing a replacement board. Check the label on the motor housing or refer to your user manual.
Buying Guide: How to Choose the Right Replacement Circuit Board
When shopping for a replacement circuit board, consider the following:
1. Genuine vs Aftermarket
- Genuine Chamberlain or LiftMaster parts ensure longer life and proper compatibility.
- Some aftermarket boards may be cheaper but risk reliability.
2. Seller Reputation
- Purchase from reputable sources (Amazon, LiftMaster dealers, certified retailers).
- Avoid unknown eBay sellers or unverified vendors.
3. Warranty
- Look for at least a 1-year warranty.
- Some boards offer extended warranties for peace of mind.
4. Product Reviews
- Read user reviews to ensure the board worked well with similar openers.
- Look for verified purchases and detailed installation feedback.
Tips for Maintaining Your Garage Door Opener Circuit Board
Once your new Liftmaster Chamberlain 41Db002 2 circuit board is installed, regular maintenance can extend its lifespan:
- Keep the unit dry: Avoid water exposure or moisture in your garage ceiling.
- Use surge protection: Power surges during storms can fry sensitive components.
- Clean regularly: Dust buildup can affect internal circuits.
- Inspect annually: Check for signs of overheating or wear.
- Avoid overheating: Ensure ventilation in the motor housing.
Frequently Asked Questions (FAQs)
Q: Can I repair a damaged circuit board instead of replacing it?
A: Technically, yes — but unless you’re experienced in electronics and soldering, replacing the Liftmaster Chamberlain 41Db002 2 garage door opener circuit board is safer and more reliable.
Q: Why does my opener still not work after replacing the circuit board?
A: Double-check your wiring connections, power supply, and make sure all safety sensors are aligned properly. If issues persist, the motor or transformer may be faulty.
Q: Can I use a different circuit board model?
A: Not recommended. Circuit boards are model-specific, and using a different part may result in incompatibility or damage.
Final Thoughts
The Liftmaster Chamberlain 41Db002 2 garage door opener circuit board is a crucial component that keeps your garage door opener functioning reliably. When it starts to fail, you’ll notice unusual behavior, lack of response, or complete system failure. Fortunately, replacing this board is a cost-effective and relatively simple fix that restores full control to your garage system.
Whether you’re a DIY enthusiast or just a homeowner wanting to save money on repairs, understanding how this circuit board works — and how to replace it — empowers you to maintain a secure and smoothly operating garage door system.
By choosing a genuine replacement and following basic safety precautions, you can confidently bring your garage door opener back to life.
Leave a Reply