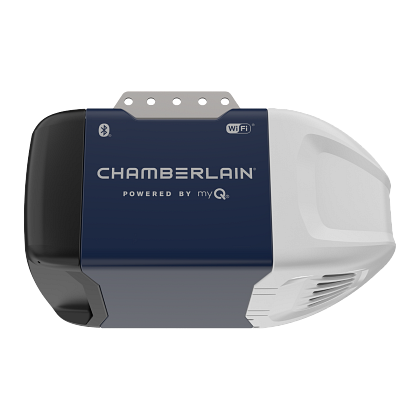
Are you upgrading your old garage door opener or installing a brand-new system? If you’ve chosen the Chamberlain C2202 Garage Door Opener, you’ve made a smart decision. This reliable chain drive model is designed for durability and performance, ideal for homeowners who want dependable garage access without breaking the bank.
But how do you go about installing it? This comprehensive guide explains how to install a Chamberlain C2202 garage door opener step-by-step, so you can do it confidently and correctly—even if you’ve never installed one before.
Why Choose the Chamberlain C2202?
Before jumping into the installation process, it’s helpful to understand the key benefits of the Chamberlain C2202 model. This chain-driven opener offers:
- ½ HP motor strong enough to lift most standard residential garage doors.
- Durability thanks to its rugged steel chain drive.
- MyQ compatibility, which allows smart control via Wi-Fi (gateway sold separately).
- Security+ 2.0® encryption to protect against hacking.
- Trusted Chamberlain engineering, backed by years of innovation.
All of this makes it an excellent, budget-friendly solution for many homeowners.
What You’ll Need Before You Begin
To ensure a smooth installation, gather all necessary tools and check that your package includes all required components.
Basic Tools:
- Drill with bits
- Socket wrench set
- Tape measure
- Screwdrivers
- Adjustable wrench
- Pliers
- Level
- Step ladder
- Safety glasses
Included Parts (Check the Box):
- Motor unit
- Chain drive rail assembly
- Chain, sprocket, and tensioner
- Trolley and arm bar
- Header bracket
- Hanging brackets
- Wall-mounted control panel
- Safety sensors
- Mounting hardware
- Instruction manual
Make sure you read the product manual carefully. While this guide covers the full process, always consult your specific manual for variations.
Safety First
Before installing any garage door opener, ensure the door is in good condition. Test it manually—if it’s difficult to open or has broken springs, call a professional first. A faulty garage door can damage the opener or cause injury.
How To Install A Chamberlain C2202 Garage Door Opener: Step-by-Step Instructions
Let’s walk through the process of how to install a Chamberlain C2202 garage door opener from start to finish. The steps below will help you complete the job efficiently and safely.
Step 1: Assemble the Rail and Attach the Chain
- Lay out the rail sections flat on the floor.
- Connect them together until fully assembled.
- Slide the trolley (door-moving component) onto the rail.
- Attach the sprocket to the motor unit and the idler pulley to the rail’s front.
- Thread the chain around the sprocket and pulley, then attach it to the trolley.
- Adjust the chain tension using the provided tensioning bolt—allow about 1/4″ slack at the midpoint.
Check alignment with a level to prevent future issues.
Step 2: Connect the Rail to the Motor Unit
- Mount the rail to the top of the motor unit using bolts and brackets provided.
- Ensure it’s securely fastened, straight, and aligned with the garage ceiling.
This connection will be the core structure that drives the door open and closed.
Step 3: Install the Header Bracket
- Locate the center of the garage door and mark a point 2-6 inches above the high point of door travel.
- Mount the header bracket into the wall stud using lag bolts.
- Attach the front end of the rail to the bracket using a clevis pin and fastener.
This step ensures proper balance and torque distribution during operation.
Step 4: Secure the Motor Unit to the Ceiling
- Use metal mounting straps or angle brackets to suspend the motor unit from ceiling joists.
- Keep the motor level and aligned with the rail.
- Use lag bolts to fasten the brackets into solid wood—not drywall.
Allow at least 2 inches of clearance around the motor for ventilation and easy access.
Step 5: Attach the Trolley Arm to the Garage Door
- Connect the straight door arm to the garage door.
- Connect the curved arm to the trolley.
- Join both arms together using the included bolts and pins.
Manually move the trolley using the emergency release handle to ensure smooth operation.
Step 6: Install the Safety Sensors
- Mount one photo-eye sensor on either side of the garage door, approximately 6 inches above the floor.
- Use provided brackets and fasteners to secure them.
- Run the wiring along the wall, ensuring no kinks or damage.
- Plug the sensor wires into the designated terminals on the motor.
The sensors must face each other directly for proper operation.
Step 7: Install the Wall Control Panel
- Choose a location near the garage entry door, about 5 feet above the floor.
- Mount the wall control using screws and anchors if needed.
- Connect the wires to the motor unit, matching the color-coded terminals.
Test the wall control to verify that it activates the motor.
Step 8: Plug In and Power Up
- Plug the opener into a ceiling-mounted outlet.
- If none exists, consider hiring an electrician to install one.
- Use the control panel to open and close the garage door.
- Adjust up/down travel limits using the buttons on the motor unit until the door opens and closes fully.
Step 9: Test Safety Features
- Place a 2×4 board under the door and try to close it. The door should reverse upon contact.
- Interrupt the sensor beam during closing. The door should reverse automatically.
- Pull the emergency release to test manual operation.
These safety features are critical and must work properly.
Step 10: Program the Remote Controls
- Press the “Learn” button on the motor unit.
- Within 30 seconds, press the desired button on your remote control.
- Wait for the motor light to flash, confirming the pairing.
You can repeat the process to program additional remotes or keypads.
Step 11: Set Up MyQ (Optional)
While the Chamberlain C2202 doesn’t have built-in Wi-Fi, you can make it MyQ-compatible by purchasing the MyQ Internet Gateway (sold separately).
- Plug in the gateway and connect it to your router.
- Download the MyQ app and create an account.
- Follow the on-screen steps to sync your garage door opener.
This allows remote control of your garage via smartphone.
Troubleshooting Tips
| Issue | Possible Fix |
|---|---|
| Door doesn’t open/close | Check power and wiring, test wall control |
| Chain too loose or tight | Adjust using the tension bolt |
| Sensors blinking | Re-align photo-eyes, check wiring |
| Door reverses unexpectedly | Adjust travel limits or check for obstructions |
| Remote not responding | Reprogram or replace battery |
Always refer to the user manual for additional troubleshooting help.
Maintenance Tips After Installation
Once you’ve completed installation, follow these maintenance practices:
- Check chain tension twice per year.
- Lubricate moving parts like rollers and hinges.
- Test safety features monthly.
- Clean the sensor lenses to prevent malfunction.
These steps ensure long-term functionality and safety.
Final Thoughts
Now that you’ve learned how to install a Chamberlain C2202 garage door opener, you’re ready to enjoy the benefits of a secure, dependable, and durable garage access system. With a bit of time and attention to detail, this DIY project can be a very rewarding home improvement task.
Even if you’re a beginner, this guide empowers you to tackle the job safely and confidently. And with proper installation, your Chamberlain C2202 will provide years of worry-free operation.
Leave a Reply