Whether you’ve just purchased your first Chamberlain garage door opener or you need a new remote, knowing How To Connect Remote To Chamberlain Garage Door Opener is a game-changer. You’ll avoid technical headaches, enjoy reliable control, and boost convenience in no time. This comprehensive guide offers a clear, step-by-step walkthrough that makes remote setup effortless, even for complete beginners.
In this article, you’ll learn:
- Why remote programming matters
- The tools and prerequisites required
- A detailed guide on How To Connect Remote To Chamberlain Garage Door Opener
- Troubleshooting tips for common issues
- Best practices for ultimate convenience and security
By the end, you’ll be a pro at syncing remotes with any compatible Chamberlain opener—making daily routines easier and more efficient.
Why You Need to Know How To Connect Remote To Chamberlain Garage Door Opener
Mastering remote setup doesn’t just save money; it’s also incredibly convenient:
- Cost-effective – No need to hire a technician just for programming.
- Boosted security – Proper programming ensures rolling code encryption is active.
- Simplified access – Easily add or remove family member remotes.
- Disaster-proof – Quick reprogramming after battery or remote replacement.
Once you understand How To Connect Remote To Chamberlain Garage Door Opener, syncing remotes becomes fast, safe, and stress-free.
Tools and Requirements Before Starting
Before diving into programming, gather:
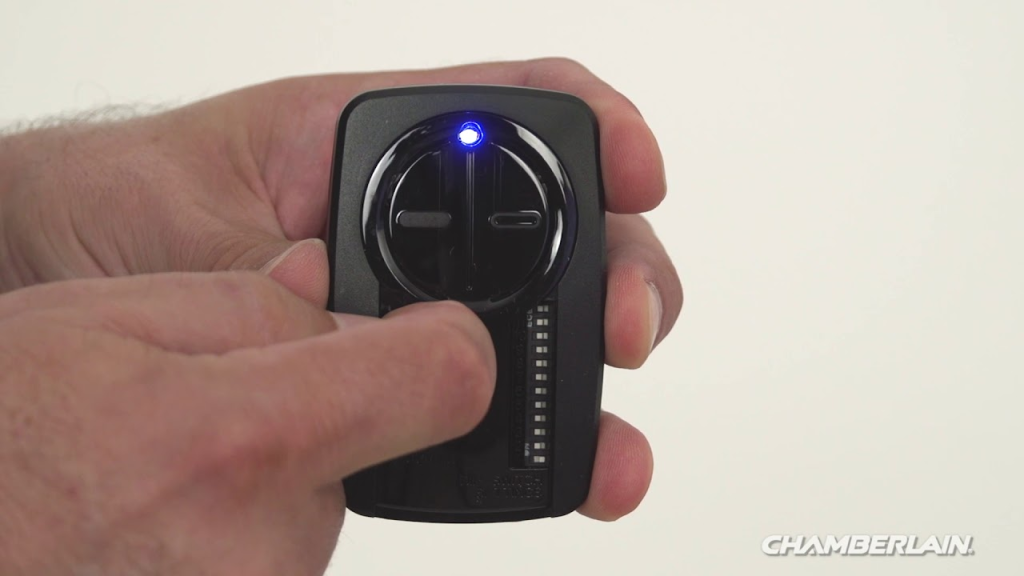
- Your Chamberlain or LiftMaster garage door opener unit
- One or more Chamberlain remote controls (mini remotes, visor clip, or keypad fob)
- A ladder to access the opener’s “Learn” button on the motor housing
- Good lighting in your garage
- Fresh batteries in the remote(s)
Most modern Chamberlain units support up to five remotes, using rolling code technology to prevent unauthorized duplication. Ensure your remote is compatible with your opener model—look for “C,” “PD,” or “B” prefixes on the opener’s model number.
How To Connect Remote To Chamberlain Garage Door Opener in 7 Clear Steps
Follow these easy steps to program a remote:
Step 1: Identify the “Learn” Button
Locate the “Learn” button on your opener’s motor housing. It may be colored red, yellow, purple, or green, depending on the model. This button activates the programming mode.
Step 2: Clear Existing Codes (Optional but Recommended)
To start fresh:
- Press and hold the Learn button for ~6 seconds, until the indicator light turns off.
- This clears all previously paired remotes and keypads.
Step 3: Activate Programming Mode
Press and release the Learn button once. The indicator light will turn on or begin blinking—signaling readiness to sync a remote.
Step 4: Push the Remote Button
Within 30 seconds:
- Press the button on your remote that you want to use.
- The opener’s indicator light should flash or pause, showing a successful sync.
Step 5: Confirm Functionality
Walk outside and press the programmed remote to open/close the garage door. If the door operates, programming was successful.
Step 6: Add More Remotes
Repeat Steps 3–5 for each additional remote. Each paired button syncs separately.
Step 7: Secure Your System
Optionally hold the Learn button for 6 seconds to lock unused remotes and prevent new ones from connecting.
Useful Tips on How To Connect Remote To Chamberlain Garage Door Opener
- Stay Within Range: Press the remote button inside or within 10 feet to ensure strong signal during programming.
- Use Enough Light: A flashlight helps avoid missing the Learn button or indicator flash.
- Button Clarity: Hold the remote button firmly for 1 second—don’t press too briefly.
- No Rush: Wait a moment after releasing the Learn button before pressing the remote.
- Battery Check: Fresh batteries help avoid weak signals during programming.
Small details make a big difference when learning How To Connect Remote To Chamberlain Garage Door Opener reliably.
Troubleshooting: When Programming Fails
Even clear guides run into hiccups sometimes. Here’s how to fix common issues:
| Problem | Potential Solution |
|---|---|
| Nothing happens when remote is pressed | Replace remote battery; retry programming |
| Indicator light doesn’t flash | You may have held Learn too long—start over |
| Remote works inconsistently | Test again in close range; check battery health |
| Multiple remotes conflict | Erase all codes and reprogram each one afresh |
| Model compatibility issues | Verify remote matches opener brand/type |
TIP: If none of these fixes work, consult Chamberlain customer support or your manual for model-specific steps.
Advanced Workarounds and Best Practices
Firmware Updates
Access the MyQ app on Wi-Fi-enabled openers to check for firmware upgrades that improve connectivity or security.
Lockout Feature
If you frequently loan remotes, temporarily hold the Learn button to disable programming. This keeps untrusted remotes from syncing.
Remote Battery Storage
Even unused remotes can lose battery over time. Activate and store them every few months to keep them functional.
Emergency Backup
Keep an extra remote in your car or safe location—if one is lost, you’ll avoid getting locked out.
Benefits of Mastering This Skill
- DIY Simplicity: No need for technicians or fees—just you and your remote.
- Peace of Mind: Ensure only trusted devices are connected.
- Smart Scaling: Easily add remotes for guests, family members, or rentals.
- Security Control: Erase old devices at any time to protect access.
Understanding How To Connect Remote To Chamberlain Garage Door Opener gives you total control over your garage’s entry system.
Frequently Asked Questions
Q: Can I connect a second-hand remote?
A: Yes—but first erase all existing codes, then program your new remote per steps above.
Q: How many remotes does a Chamberlain opener support?
A: Typically up to five, depending on model. Always check your manual.
Q: Will programming erase keypad codes?
A: Clearing the opener removes all remotes and wireless devices including keypads. Reprogram as needed.
Q: Why did the remote disconnect?
A: Common causes include dead battery, radio interference, or operator accidentally cleared codes.
Conclusion
Learning How To Connect Remote To Chamberlain Garage Door Opener provides lasting convenience, security, and peace of mind. With simple tools and clear steps, you can add or remove remotes whenever needed—no tech support required. Combine this knowledge with routine checks, strong controls, and backup remotes to create a smart, efficient, and reliable garage system.
If you’d like help choosing remotes, selecting dual-button vs. visor remotes, or integrating with MyQ or Alexa, just let me know—I’m here to help!
Leave a Reply